NextCloud
Introduction
This help guide provides an introduction to using Nextcloud as part of the gE.CO toolbox. The text has been adapted from original documentation provided by Nextcloud under Creative Commons license (CC-BY-3.0). Full credit is given to Nextcloud for creating the original documentation.
This help guide is in English, but you can help translate this guide into other languages.
About this guide
The original documentation on which this guide is based was written and maintained by the development team at Nextcloud in Germany.
This documentation is relevant to the version of Nextcloud that has been used as part of the gE.CO toolbox (version 19). However, at the time of writing, the latest release of Nextcloud is version 22. This means that some things explained about Nextcloud elsewhere (such as online help guides) may be different in this version. In addition, this guide may not be relevant for other deployments of Nextcloud elsewhere (e.g. on other websites or servers).
This guide has been carefully edited to be relevant to users of the gE.CO toolbox. However, the original documentation on which this guide is based was written to explain all features and settings in Nextcloud 19. The gE.CO toolbox version may not have all of these features available. Settings such as storage space, applications and custom colours/styles can vary between realisations of Nextcloud, so please bear this in mind.
If you think an edit to this guide is required, please contact the gE.CO project team at Newcastle University.
What is Nextcloud?
Welcome to Nextcloud: A safe home for all your data.
Nextcloud is an open-source file sync and share software provided through the ge.CO toolbox. Nextcloud provides a safe, secure, and compliant file synchronisation and sharing solution on a server set up as part of the running of the gE.CO toolbox.
You can share one or more files and folders on your computer, and synchronise them with your Nextcloud server. Place files in your local shared directories, and those files are immediately synchronised to the server and to other devices using the Nextcloud Desktop Sync Client, Android app, or iOS app. To learn more about the Nextcloud desktop and mobile clients, please refer to their respective manuals in Nextcloud's documentation base:
New features in this version of Nextcloud
-
Easier way to select a new app

-
New Contacts menu to reach your colleagues or friends easier

-
A contact popup menu over avatars everywhere

-
Ability to send multiple unique sharing links each with their own settings, by entering email addresses (the recipient will receive an email)

-
Many other improvements and new apps, like screensharing in Video calls, new Circles app for user defined groups, push notifications, notifications of file changes even when shared to another server, undo removal of files from a shared folder even if the removal was done by a recipient, directly sharing to social media and much more.
Accessing Nextcloud through the gE.CO toolbox
You can connect to Nextcloud via gecotoolbox.io. Navigate to Go to the services and press the Open service button beside the Nextcloud service you require.

Web browser requirements
For the best experience with the Nextcloud web interface, we recommend that you use the latest and supported version of a browser from this list:
- Microsoft Internet Explorer
- Microsoft Edge
- Mozilla Firefox
- Google Chrome/Chromium
- Apple Safari
NOTE
If you want to use Nextcloud Talk, you need to run Mozilla Firefox 52+ or Google Chrome/Chromium 49+ to have the full experience with video calls and screensharing. Google Chrome/Chromium requires a additional plugin for screensharing.
Creating an account
To access Nextcloud through the gE.CO toolbox, you will first need to create an account.
Once you have navigated to Nextcloud through the gE.CO toolbox and selected your service, you will be presented with a log in screen. If you already have an account, this is where you enter your username/email or password. If you have not yet created an account, you have three options. You can:
- Register via an email and verification link;
- Log in with your Google account, or;
- Log in with your Facebook account.
If you are registering via an email, select Register and then enter your email in the box. Once you have pressed Request verification link, check your emails for a link to finish creating your account with a username and password.
If you are logging in via Google or Facebook, you will be asked to enter your Google/Facebook account details. You may also be asked to allow Nextcloud access to your account details. These details are only used for the purposes of logging into Nextcloud, and it does not grant Nextcloud nor the administrators access to your accounts.
Each user of Nextcloud on the gE.CO toolbox has 2GB of storage space. A small amount of this will already be allocated for system data.
What you create, upload and store through your Nextcloud account will be only be accessible to you. It will also be accessible by the gE.CO toolbox administrators who control the server that powers Nextcloud, but administrators will not directly access your account.
Other users of Nextcloud cannot access your files or your data, unless you decide to share it with them through file sharing.
Navigating the main user interface
By default, the Nextcloud Web interface opens to your Files page. You can add, remove, and share files, and make changes based on the access privileges set by the administrator of Nextcloud. Please note that some features of Nextcloud may not yet have been made available for users of the gE.CO toolbox.

The Nextcloud user interface contains the following fields and functions:
- Apps Selection Menu (1): Located in the upper left corner, you’ll find all your apps which are available on Nextcloud. Clicking on an apps icon will redirect you to the app.
- Apps Information field (2): Located in the left sidebar, this provides filters and tasks associated with your selected app. For example, when you are using the Files apps you have a special set of filters for quickly finding your files, such as files that have been shared with you, and files that you have shared with others. You’ll see different items for other apps.
- Application View (3): The main central field in the Nextcloud user interface. This field displays the contents or user features of your selected app.
- Navigation Bar (4): Located over the main viewing window (the Application View), this bar provides a type of breadcrumbs navigation that enables you to migrate to higher levels of the folder hierarchy up to the root level (home).
- New button (5): Located in the Navigation Bar, the
Newbutton enables you to create new files, new folders, or upload files.
NOTE
You can also drag and drop files from your file manager into the Files Application View to upload them. Currently, the only Web browsers that support drag-and-drop folders are Chrome and Chromium.
- Search field (6): Click on the magnifier in the upper right hand corner of to search for files.
- Contacts Menu (7): Gives you an overview about your contacts and users connected to your Nextcloud account. Dependent on the given details and available apps, you can directly start a video call with them or send emails.
- Gallery button (8). This looks like four little squares, and takes you directly to your image gallery.
- Settings menu (9): Click on your profile picture, located to the right of the Search field, to open your Settings dropdown menu. Your Settings page provides the following settings and features:
- Personal info (includes profile picture, group memberships, storage space, language options and social media sharing buttons)
- Security (includes passwords, two-factor authentication and managing connected browsers and devices)
- Social media login with Google and Facebook
- Activity (for notification settings)
- Mobile & desktop (for downloads to other apps and calendar and contact integrations)
- Accessibility (inlcuding high contrast, dark and dyslexia support options)
- Sharing (for Federated Cloud and file ownership transfer options)
- Flow (which allows you to write event information into a Nextcloud conversation)
- Privacy (which indicates how your data on Nextcloud is being used and who has access to it)
- Collabora Online (which allows you to specify a directory for templates on the Collabora integration)
See the Setting your preferences section to learn more about these settings.
Files and synchronisation
Accessing your files
You can access your Nextcloud files with the Nextcloud Web interface and create, preview, edit, delete, share, and re-share files.

Tagging files
You can assign tags to files. To create tags, open a file to the Details view. Then type your tags. To enter more than one tag press the return key after creating each tag. All tags are system tags, and are shared by all users.

Then use the Tags filter on the left sidebar to filter files by tags:

Comments
Use the Details view to add and read comments on any file or folder. Comments are visible to everyone who has access to the file:

Video player
You can play videos in Nextcloud with the Video Player app by simply clicking on the file. Video streaming by the native Nextcloud video player depends on your Web browser and the video format. See this guide for supported multimedia formats in Web browsers.

File controls
Nextcloud can display thumbnail previews for image files, MP3 covers, and text files. Hover your cursor over a file or folder to expose the controls for the following operations:
-
Favourites
Click the star to the left of the file icon to mark it as a favorite:

You can also quickly find all of your favorites with the Favourites filter on the left sidebar.
-
Overflow Menu
The Overflow menu (three dots) displays file details, and allows you to rename, download, or delete files:
 The Details view shows Activities, Sharing, and Versions information:

The Settings gear icon at the lower left allows you to show or hide hidden files in your Nextcloud Web interface. These are also called dotfiles, because they are prefixed with a dot, e.g. .mailfile. The dot tells your operating system to hide these files in your file browsers, unless you choose to display them. Usually these are configuration files, so having the option to hide them reduces clutter.

Previewing files
You can display uncompressed text files, OpenDocument files, videos, and image files in the Nextcloud embedded viewers by clicking on the file name. There may be other file types you can preview too. If Nextcloud cannot display a file, it starts a download process and downloads the file to your computer.
Navigating inside your Nextcloud
Navigating through folders in Nextcloud is as simple as clicking on a folder to open it and using the back button on your browser to move to a previous level. Nextcloud also provides a navigation bar at the top of the Files field for quick navigation.
Sharing status icons
Any folder that has been shared is marked with the Shared overlay icon. Public link shares are marked with a chain link. Unshared folders are not marked:

Creating or uploading files and directories
Upload or create new files or folders directly in a Nextcloud folder by clicking on the New button in the Files app:

The New button provides the following options:
-
Up arrow
Upload files from your computer into Nextcloud. You can also upload files by dragging and dropping them from your file manager.
-
Text file
Creates a new text file and adds the file to your current folder.
-
Folder
Creates a new folder in the current folder.
Selecting files or folders
You can select one or more files or folders by clicking on their checkboxes. To select all files in the current directory, click on the checkbox located at the top of the files listing.
When you select multiple files, you can delete all of them, or download them as a ZIP file by using the Delete or Download buttons that appear at the top.
Filtering the files view
The left sidebar on the Files page contains several filters for quickly sorting and managing your files.
-
All files
The default view; displays all files that you have access to.
-
Favourites
Files or folders marked with the yellow star.
-
Shared with you
Displays all files shared with you by another user or group.
-
Shared with others
Displays all files that you have shared with other users or groups.
-
Shared by link
Displays all files that are shared by you via public link.
-
External Storage (optional)
Files that you have access to on external storage devices and services such as Amazon S3, SMB/CIFS, FTP, etc.
Moving files
You can move files and folders by dragging and dropping them into any directory.
Creating or connecting to a Federation Share link
Federated Cloud Sharing allows you to mount file shares from remote Nextcloud servers, and manage them just like a local share. See Using Federation Shares to learn to how to create and connect to new Federated Cloud shares.
Using WebDAV
Nextcloud fully supports the WebDAV protocol, and you can connect and synchronise with your Nextcloud files over WebDAV (which stands for Web Distributed Authoring and Versioning).
Please refer to the Nextcloud documentation for how to use this feature. You can also contact gE.CO toolkit support if you need any help in using this feature.
Managing deleted files
When you delete a file in Nextcloud, it is not immediately deleted permanently. Instead, it is moved into the trash bin. It is not permanently deleted until you manually delete it, or when the Deleted Files app deletes it to make room for new files.
Find your deleted files by clicking on the Deleted files button on the Files page of the Nextcloud Web interface. You’ll have options to either restore or permanently delete files.
Quotas
Deleted files are not counted against your storage quota. Only your personal files count against your quota, not files which were shared with you. See Storage quota to learn more about quotas.
What happens when shared files are deleted
Deleting files gets a little complicated when they are shared files, as this scenario illustrates:
- User1 shares a folder “test” with User2 and User3
- User2 (the recipient) deletes a file/folder “sub” inside of “test”
- The folder “sub” will be moved to the trashbin of both User1 (owner) and User2 (recipient)
- But User3 will not have a copy of “sub” in their trash bin
When User1 deletes “sub” then it is moved to User1’s trash bin. It is deleted from User2 and User3, but not placed in their trash bins.
When you share files, other users may copy, rename, move, and share them with other people, just as they can for any computer files; Nextcloud does not have magic powers to prevent this.
How the deleted files app manages storage space
To ensure that users do not run over their storage quotas, the Deleted Files app allocates a maximum of 50% of their currently available free space to deleted files. If your deleted files exceed this limit, Nextcloud deletes the oldest files (files with the oldest timestamps from when they were deleted) until it meets the memory usage limit again.
Nextcloud checks the age of deleted files every time new files are added to the deleted files. By default, deleted files stay in the trash bin for 30 days, but the gE.CO toolbox administrator can adjust this value. Files older than this will be deleted permanently. Additionally, Nextcloud calculates the maximum available space every time a new file is added. If the deleted files exceed the new maximum allowed space Nextcloud will expire old deleted files until the limit is met once again.
NOTE
Contact gE.CO toolkit support if you need files kept for longer than 30 days.
Desktop and mobile synchronisation
For synchronising files with your desktop computer, we recommend using the Nextcloud Sync Client for Windows, macOS and Linux.
The Nextcloud Desktop Sync Client enables you to connect to Nextcloud on the gE.CO toolbox. You can create folders in your home directory, and keep the contents of those folders synced with Nextcloud. Simply copy a file into the directory and the Nextcloud desktop client does the rest. Make a change to the files on one computer, it will flow across the others using these desktop sync clients. You will always have your latest files with you wherever you are.
Its usage is documented separately in the Nextcloud Desktop Client Manual.
Mobile clients
Visit your Personal page in your Nextcloud Web interface to find download links for Android and iOS mobile sync clients. Or, visit the Nextcloud download page.
Encrypting your Nextcloud files
Nextcloud includes a server side Encryption app, which can enable all of your Nextcloud data files to be automatically encrypted on the server.
Please contact gE.CO toolkit support if you wish to make use of this feature.
File Sharing
Nextcloud users can share files and folders. Possible targets are:
- public links
- users
- groups
- circles
- talk conversations
- users or groups on federated Nextcloud servers
Public link shares
You can share files and folders via public links.
A random 15-digit token will be created. The link will look like https://cloud.example.com/s/yxcFKRWBJqYYzp4.
A number of options are available for public folder shares:

- Read only to allow viewing and downloading
- Allow upload and editing
- With File drop, the sharee can only upload files to a folder without seeing the files that are already in that folder.
- Hide download prevents the sharee from downloading
- Password protect
- Set expiration date will automatically disable the share
- Note to recipient
- Unshare to revert the share
- Add another link to create multiple public links with different rights
For public file shares, you may allow editing the file with one of Nextcloud’s collaborative editing solutions.

NOTE
In this version of Nextcloud, Password protection and file expiration are not available using Federated File Sharing.
Internal shares with users and groups
When sharing with users, groups, circles or members of a Talk conversation, rights for the files or folder contents are adjustable:

As a sharee, you can configure if you automatically want to accept all incoming shares and have them added to your root folder, or if you want to be asked each time if you want to accept or decline the share.

For adjusting the acceptance setting, go to Settings > Personal > Sharing

Others with access
In order to find out if a file or folder is accessible to others through sharing of a superior folder hierarchy level, click on Others with access in the sharing tab.

The list shows all users, groups, chats etc. that the current object has been given access to through sharing of a superior folder in the hierarchy.

Click on the three dots to
- see who initiated the share
- see where the share was initiated (click to navigate to the folder, as far as you have access there)
- unshare the initial share (only accessible for the share owner)
NOTE
This information is only visible to the owner of a file/folder or sharees with resharing rights.
Federated Shares
Federation Sharing allows you to mount file shares from remote Nextcloud servers (for example, those run by another organisation or collective). In effect, this creates your own cloud of Nextclouds. You can create direct share links with users on other Nextcloud servers.
Creating a new Federation Share
Federation sharing is enabled by default. Follow these steps to create a new share with other Nextcloud or ownCloud servers:
Go to your Files page and click the Share icon on the file or directory you want to share. In the sidebar enter the username and URL of the remote user in this form: <username>@<nc-server-url>. In this example, that is bob@cloud.example.com.

The sharee is receiving a notification in their Nextcloud, allowing them to either accept or decline the incoming share.

Adding a public share to your Nextcloud
Nextcloud public link share pages offer an option to add that file or folder as a federated share into Nextcloud on the gE.CO toolbox. Just enter your <username>@<nc-server-url> just like shown for outbound shares above:

Making anonymous uploads
You may create your own special upload directories so that other people can upload files to you without having a log in for Nextcloud through the gE.CO toolbox, and without being a Nextcloud user. They will not be allowed to see the contents of this directory, or to make any changes. This is an excellent alternative to sending large attachments via email or using commercial file-sharing services.
Setting up your own file drop
Go to Files and create or choose the folder, the anonymous upload should be made to.

Check Share Link, Allow editing, Hide file listing.

Now you can send the link to the upload folder.
Uploading files
Using the anonymous upload function is simple. You receive a link to the upload folder, click the link, and then you’ll see a Nextcloud page with a “Click to upload” button.

This opens a file picker, and you select the file or directory you want to upload. You’re also able to just drop files into the window.
When your upload is completed, the filenames are listed:

Larger file uploads
Uploading files through the web client may be limited to smaller file sizes because of how Nextcloud is programmed. If you experience any difficulties in uploading files, please contact gE.CO toolbox support.
Storage quota
Your Nextcloud admin has the option to set a storage quota on users. With users of the gE.CO toolbox, this is currently 2GB. This figure is being regularly reviewed by administrators based on usage. Look at the top of your Personal page to see how much of this quota you have used.

It may be helpful to understand how your quota is calculated.
Metadata (thumbnails, temporary files, cache, and encryption keys) takes up about 10% of disk space, but is not counted against user quotas. Some apps store information in the database, such as the Calendar and Contacts apps. This data is excluded from your quota.
When other users share files with you, the shared files count against the original share owner’s quota. When you share a folder and allow other users or groups to upload files to it, all uploaded and edited files count against your quota. When you re-share files shared with you, the re-share still counts against the quota of the original share owner.
Encrypted files are a little larger than unencrypted files; the unencrypted size is calculated against your quota.
Deleted files that are still in the trash bin do not count against quotas. The trash bin is set at 50% of quota. Deleted file aging is set at 30 days. When deleted files exceed 50% of quota then the oldest files are removed until the total is below 50%.
When version control is enabled, the older file versions are not counted against quotas.
If you create a public share via URL and allow uploads, any uploaded files count against your quota.
Version control
Nextcloud supports simple version control system for files. Versioning creates backups of files which are accessible via the Versions tab on the Details sidebar. This tab contains the history of the file where you can roll back a file to any previous version. Changes made at intervals greater than two minutes are saved in data/[user]/files_versions.

To restore a specific version of a file, click the circular arrow to the left. Click on the timestamp to download it.
The versioning app expires old versions automatically to make sure that the user doesn’t run out of space. This pattern is used to delete old versions:
- For the first second, we keep one version
- For the first 10 seconds, Nextcloud keeps one version every 2 seconds
- For the first minute, Nextcloud keeps one version every 10 seconds
- For the first hour, Nextcloud keeps one version every minute
- For the first 24 hours, Nextcloud keeps one version every hour
- For the first 30 days, Nextcloud keeps one version every day
- After the first 30 days, Nextcloud keeps one version every week
The versions are adjusted along this pattern every time a new version gets created.
The version app never uses more that 50% of the user’s currently available free space. If the stored versions exceed this limit, Nextcloud deletes the oldest versions until it meets the disk space limit again.
Projects
Users can associate files, chats and other items with each other in projects. The various apps will present these items in a list, allowing users to immediately jump to them. Projects are Nextcloud wide. When a user shares a file that is part of a project, the share recipient can see that project, too. A click on any of the items in a project leads right to it, be it a chat, a file or a task.
Create a new project
A new project can be created by linking two items together. Start off by opening a file or folders sharing sidebar.

Click Add to a project and select the type of item you want to link with the current file/folder. A selector will open that allows you selecting a Talk conversation for example.

Once the item has been selected a new project is being created and listed in the sharing tab of the sidebar. The same project will also appear in the sharing sidebar of the linked items.

The list entry shows quick links to a limited number of items. By opening the context menu, the project can be renamed and the full list of items can be expanded.
Adding more entries to a project
If another item should be added to an already existing project this can be done by searching for the project name in the Add to a project picker.

Visibility of projects
Projects do not influence the access and visibility of the different items. Users will only see projects of other users if they have access to all contained items.
Transfer Ownership
Users can transfer the ownership of files and folders to other users. Share ownerships of those transfered files/folders will also be transferred.
-
Navigate to Settings > Personal > Sharing > Files.
-
Click on Choose file or folder to transfer >> A file picker opens, showing all files and folders in the user’s account.
-
Pick a file or folder and click on Choose >> The chosen file or folder name gets displayed.
-
Click on Change to change the choice if necessary.
-
Pick a new owner by typing their name into the search field next to New owner.
-
Click on Transfer.
-
The target user receives a notification where they are being asked whether to accept or reject the incoming transfer.

-
If accepted, the target user finds the transferred files and folders in their root under a folder Transferred from [user] on [timestamp].
-
The source user gets informed about the acceptance or rejection by a notification.
Calendar and Contacts
Nextcloud comes with various productivity apps to help teams with collaboration. This is refered to as Groupware in the Nextcloud User Manual. In this section, we describe how to use the Calendar and Contacts apps in the gE.CO toolbox.
The Calendar and Contacts apps use CalDAV/CardDAV with the respective web interfaces.
Nextcloud also includes Deck, a project management tool which allows you to create Kanban-style task boards and share them with your team.
You can find out more about Nextcloud Groupware on Nextcloud's website.
Using the Contacts app
The Nextcloud Contacts app is similar to other mobile contact applications, but with more functionality. Let’s run through basic features that will help you maintain your address book in the application.
Below, you will learn how to add contacts, edit or remove contacts, upload a contact picture and manage your Contact app address books.
Adding Contacts
When you first access the Contacts app, an empty default address book becomes available.

Default Address Book (empty)
To add contacts into your address book, you can use one of the following methods:
- Import contacts using a Virtual Contact File (VCF/Vcard) file
- Add contacts manually
The fastest way to add a contact is to use a Virtual Contact File (VCF/Vcard) file.
Importing Virtual Contacts
To Import Contacts Using a VCF/Vcard File:
-
Find “Settings” at the bottom of the left sidebar, next to the gear button.

-
Click the gear button. The Contacts app “Import” button will appear.

NOTE
The Contacts app only supports import of vCards version 3.0 and 4.0.
- Click the “Import” button and upload your VCF/Vcard file.
After the import is complete, you will see your new contact in your address book.
Adding Contacts Manually
If you can’t import virtual contacts, the Contacts app enables you to add contacts manually.
To Create a New Contact:
-
Click the
+ New contactbutton.An empty new contact configuration opens in the Application View field.

- Specify the new contact information. Changes that you made are implemented immediately.
Edit or Remove Contact Information
The Contacts app enables you to edit or remove contact information.
To edit or remove contact information:
- Navigate to the specific contact that you want to modify.
- Select the information in the field that you want to edit or remove.
- Make your modifications or click on the trash bin.
Changes or removals that you made to any contact information are implemented immediately.
Contact Picture
To add a picture for your new contacts, click on the upload button:

After you have set a contact picture, it will look like this:

If you want to upload a new one, remove it, view it in full size or download it, click on the contacts picture for the following options to appear:

Adding and Managing Address Books
Clicking on the “Settings” (gear) button at the bottom of the left sidebar provides access to Contact app settings. This field shows all available address books, certain options for each address book, and enables you to create new address books, simply by specifying an address books name.

The Contacts settings is also where you can share, export and delete address books. You will find the CardDAV URLs there.
See below for more details about syncing your address books with Android devices, Apple devices and other programs that use CardDAV.
Using the Calendar app
The Nextcloud Calendar app works similar to other calendar applications you can sync your Nextcloud calendars and events with.
When you first access the Calendar app, you will be presented with a blank interface. You can fill this up quickly by adding meetings, and eventually your calendar may look something like the image below.

Managing your calendars
Import a Calendar
If you want to transfer your calendar and their respective events to your Nextcloud instance, importing is the best way to do so.

- Click on the settings-icon labeled with
Settings & Importat the left-bottom. - After clicking on
+ Import Calendaryou can select one or more calendar files from your local device to upload. - The upload can take some time and depends on how big the calendar you import is.
NOTE
The Nextcloud Calendar application only supports iCalendar-compatible
.ics-files, defined in RFC 5545.
Create a new Calendar
If you plan to setup a new calendar without transferring any old data from your previous calendar, creating a new calendar is the way you should go.

- Click on
+ New Calendarin the left sidebar. - Type in a name for your new calendar, e.g. “Work”, “Home” or “Studies”.
- After clicking on the checkmark, your new calendar is created and can be synced across your devices, filled with new events and shared with your friends and colleagues.
Edit, Download or Delete a Calendar
Sometimes you may want to change the color or the entire name of a previous imported or created calendar. You may also want to export it to your local hard drive or delete it forever.
NOTE
Please keep in mind that deleting a calendar is a irreversible action. After deletion, there is no way of restoring the calendar unless you have a local backup.

- Click on the three-dot-menu of the respective calendar.

- Click on
Edit,DownloadorDelete.
Sharing calendars
You may share your calendar with other users or groups. Calendars may be shared with write access or read-only. When sharing a calendar with write access, users with whom the calendar is shared will be able to create new events into the calendar as well as edit and delete existing ones.
NOTE
Calendar shares currently can’t be accepted or rejected. If you want to stop having a calendar that someone shared with you, you can click on the 3-dot menu next to the calendar in the calendar list and click on “Unshare from me”.
Publishing a calendar
Calendars can be published through a public link to make them viewable (read-only) to external users. You may create a public link by opening the share menu for a calendar and clicking on « + » next to « Share link ». Once created you can copy the public link to your clipboard or send it through email.
There’s also an « embedding code » that provides an HTML iframe to embed your calendar into public pages.
On the public page, users are able to get the subscription link for the calendar and download the whole calendar directly.
Subscribe to a Calendar
You can subscribe to iCal calendars directly inside of your Nextcloud. By supporting this interoperable standard (RFC 5545) we made Nextcloud calendar compatible to Google Calendar, Apple iCloud and many other calendar-servers you can exchange your calendars with, including subscription links from calendar published on other Nextcloud instances, as described above.
- Click on
+ New Subscriptionin the left sidebar. - Type in or paste the link of the shared calendar you want to subscribe to.
Finished. Your calendar subscriptions will be updated regularly.
NOTE
Subscriptions are refreshed every week by default. This setting can be changed by contacting gE.CO support.
Managing Events
Create a new event
Events can be created by clicking in the area when the event is scheduled. In the day- and week-view of the calendar you just click, pull and left your cursor over the area when the event is taking place.

The month-view only requires a single click into the area of the specific day.

After that, you can type in the event’s name (e.g. Meeting with Lukas), choose the calendar in which you want to choose the event (e.g. Personal, Work), check and concretize the time span or set the event as all-day event.
If you want to edit advanced details such as the Location, a Description, Attendees, Reminders or to set the event as a repeating-event click on the More...-button to open the advanced sidebar-editor.
NOTE
If you always want to open the advanced sidebar-editor instead of the simple event editor popup, you can set a
Skip simple event editor-checkmark in theSettings & Import-section of the app.
Clicking on the blue Create-button will finally create the event.
Edit or Delete an event
If you want to edit or delete a specific event, you just need to click on it. After that you will be able to re-set all event details and open the advanced sidebar-editor by clicking on More.
Clicking on the Update-button will update the event. To cancel your changes, click on the close icon on top right of the popup or sidebar editor.
If you open the sidebar view and click the three dot menu next to the event name, you have an option to export the event as an .ics file or remove the event from your calendar.

Invite attendees to an event
You may add attendees to an event to let them know they’re invited. They will receive an email confirmation and will be able to confirm or cancel their participation to the event. Attendees may be other users on your Nextcloud instances, contacts in your addressbooks and direct email addresses. You also may change the level of participation per-attendees, or disable email confirmation for a specific attendee.

TIP
When adding other Nextcloud users as attendees to an event, you may access their Free/Busy information if it’s available, helping you to determine when is the best time slot for your event.
Only the calendar owner can send out invitations, the sharees are not able to do that, whether they have write access to the event’s calendar or not.
Setup Reminders
You can set up reminders to be notified before an event occurs. Currently supported notification methods are :
- Email notifications
- Nextcloud notifications
You may set reminders at a time relative to the event or at a specific date.

NOTE
Only the calendar owner and people or groups with whom the calendar is shared with write access will get notifications. If you don’t get any notifications but think you should, please contact gE.CO support.
NOTE
If you synchronise your calendar with mobile devices or other 3rd-party clients, notifications may also show up there.
Add recurring options
An event may be set as “recurring”, so that it can happen every day, week, month or year. Specific rules can be added to set which day of the week the event happens or more complex rules, such as every fourth Wednesday of each month.
You can also tell when the recurrence ends.

Birthday calendar
The birthday calendar is an auto-generated calendar which will automatically fetch the birthdays from your contacts. The only way to edit this calendar is by filing your contacts with birthday dates. You can not directly edit this calendar from the calendar-app.
NOTE
If you do not see the birthday calendar, please contact gE.CO support.
Synchronising with Android
Files and notifications
-
Install the Nextcloud Android client from Google Play Store or from F-Droid.
-
Start the app. There are two ways of setting it up:
Either: enter your server URL (
https://nextcloud.gecotoolbox.io/), continue, enter your user name and password and confirm to grant access.Or: In Nextcloud’s web interface, go to the user preferences, go to Security. Generate an App password, click “Generate QR code” and tap the QR scanner icon in the Nextcloud app, point your phone’s camera towards the screen.
Contacts and Calendar
With the Nextcloud mobile app
- Install DAVx⁵ (formerly known as DAVDroid) on your Android device, from Google Play Store or from F-Droid.
- In the Nextcloud mobile, go to Settings / More, tap on “Sync calendars & contacts”.
- Now, DAVx⁵ will open Nextcloud’s Webflow login window, where you will have to enter your credentials and grant access.
- After this, DAVx⁵ will close and the Nextcloud app reappears. In order to finish setup, you have to manually launch DAVx⁵ again.
- Tap on the icon for the account DAVx⁵ has just created, when requested grant DAVx⁵ access to your calendars and contacts. Optionally install OpenTasks and grant DAVx⁵ access to your tasks, too.
- When you tap the icon for the account DAVx⁵ has set up, it will discover the available address books and calendars. Choose which ones you want to synchronise and finish.
Without the Nextcloud mobile app
If you don’t want to install the Nextcloud mobile app, the following steps are required:
- Install DAVx⁵ (formerly known as DAVDroid) on your Android device, from Google Play Store or from F-Droid.
- Optionally install OpenTasks.
- Create a new account (“+” button).
- Select Connection with URL and username. Base URL: the ge.CO toolbox URL (
https://nextcloud.gecotoolbox.io/remote.php/dav) and Contact Group Method: as credentials. - Choose the option
Groups are per-contact categories. - Click Connect.
- Select the data you want to sync.
- When requested, grant access permissions to DAVx⁵ for your contacts, calendars and optionally tasks.
NOTE
Enter your email address as DAVx⁵ account name (mandatory if you want to be able to send calendar invitation). If your email address is registered in your Nextcloud preferences and you have set up your account using the Nextcloud mobile app, this all should be aready the case.
TIP
DAVx⁵ lists the calendar subscriptions made through the Nextcloud Calendar app, but you need to install the ICSx⁵ (formerly known as ICSDroid) app on your Android device, from the Google Play Store or from F-Droid to sync them.
Synchronising with iOS
Calendar
- Open the settings application.
- Select Calendar.
- Select Accounts.
- Select Add Account.
- Select Other as account type.
- Select Add CalDAV account.
- For server, type the domain name of your server i.e.
nextcloud.gecotoolbox.io. - Enter your user name and password.
- Select Next.
Your calendar will now be visible in the Calendar application.
NOTE
Beginning with iOS 12, an SSL encryption is necessary. Therefore do not disable SSL.
Contacts
- Open the settings application.
- Select Contacts.
- Select Accounts.
- Select Add Account.
- Select Other as account type.
- Select Add CardDAV account.
- For server, type the domain name of your server i.e.
nextcloud.gecotoolbox.io. - Enter your user name and password.
- Select Next.
You should now find your contacts in the address book of your iPhone.
NOTE
Beginning with iOS 12, an SSL encryption is necessary. Therefore do not disable SSL.
If it’s still not working, please contact gE.CO support.
Synchronising with macOS
Setup your Accounts
In the following steps you will add your server resources for CalDAV (Calendar) and CardDAV (Contacts) to your Nextcloud.
- Open the system preferences of your macOS device.
- Navigate to Internet Accounts.
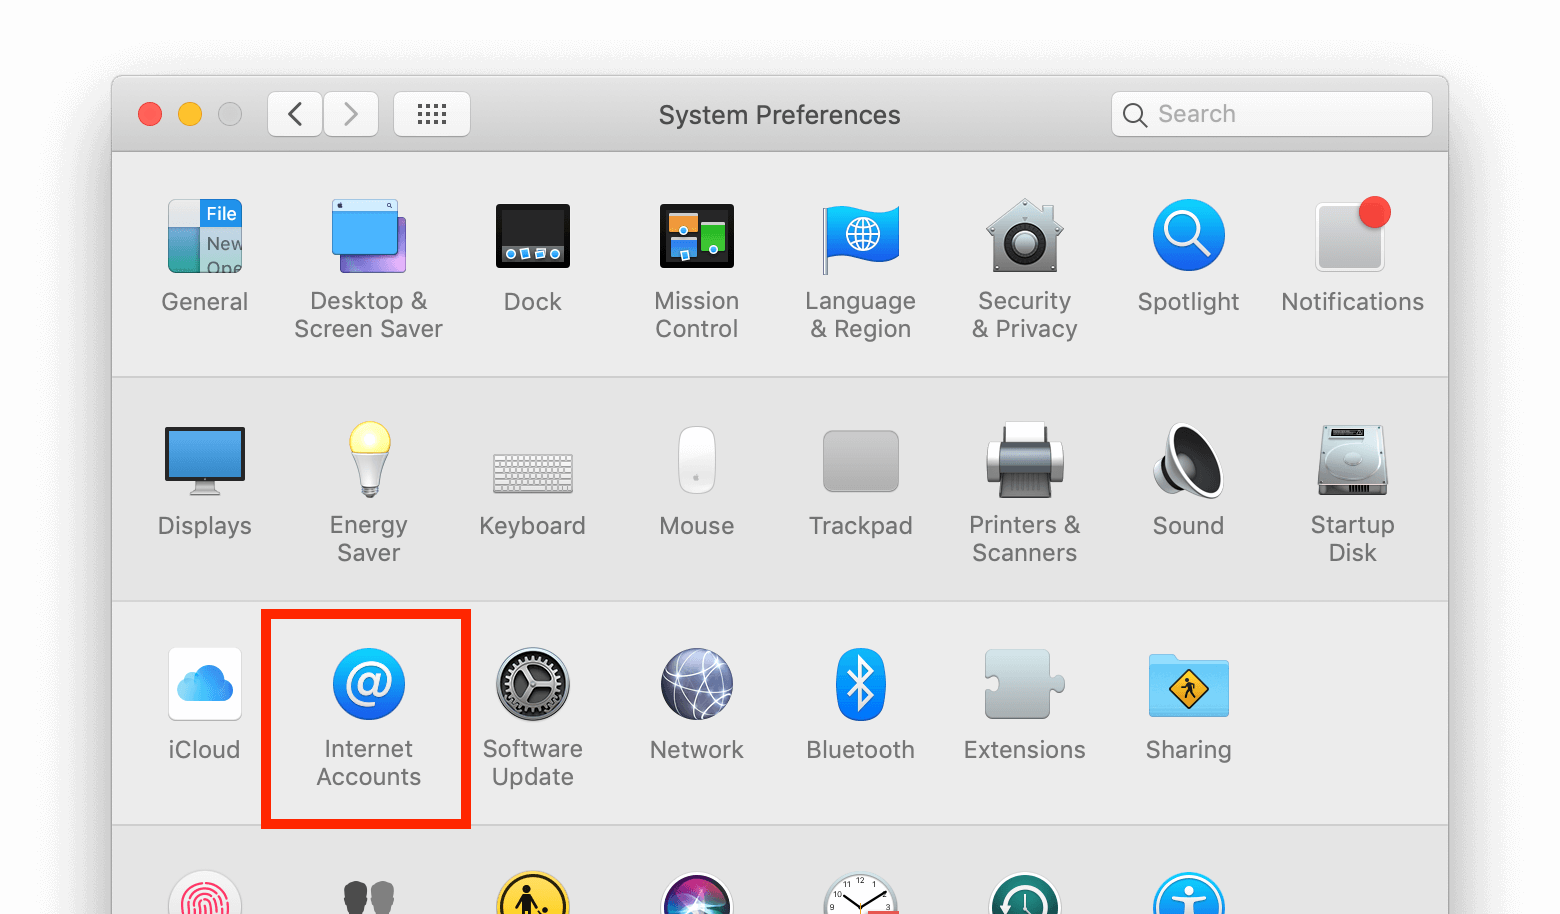
- Click on Add Other Account... and click on CalDAV Account for Calendar or CardDAV Account for Contacts.

NOTE
You can not setup Calendar/Contacts together. You need to setup them in separate accounts.
-
Select Manual as Account-Type and type in your respective credentials:
Username: Your Nextcloud username or email
Password: Your generated app-password/token (Learn more).
Server Address: URL of your Nextcloud server (
nextcloud.gecotoolbox.io). The address below is shown as an example.

- Click on Sign In.
For CalDAV (Calendar): You can now select, with which applications you want to use this resource. In the most cases, this will be the “Calendar” application, sometimes you may also want to use it for your Tasks and reminders.

Troubleshooting
- macOS does not support syncing CalDAV/CardDAV over non-encrypted
http://connections. Make sure you have typedhttps://. - Self-signed certificates need to be properly set up in the macOS keychain.
Synchronising with Windows 10
Calendar
- In your browser, navigate to the Nextcloud Calendar app. Under “Settings & import”, copy the “iOS/macOS CalDAV Address” into your clipboard.
- Launch the Windows 10 Calendar app. Then, click the settings icon (gear icon) and select “Manage accounts”.
- Click “Add account” and choose “iCloud”.
- Enter an email, username and password. None of this information has to be valid-it will all be changed in the upcoming steps.
- Click “Done”. A message should appear indicating the settings were saved successfully.
- In the “Manage Accounts” menu, click on the iCloud account created in previous steps, and select “Change settings”. Then, click on “Change mailbox sync settings”.
- Scroll to the bottom of the dialog box, select “Advanced mailbox settings”. Paste your CalDAV URL in the field labelled “Calendar server (CalDAV)”.
- Click “Done”. Enter your Nextcloud username and password in the appropriate fields, and change the account name to whatever you prefer (e. g. “Nextcloud Calendar”). Click “Save”.
Contacts
- In the bottom left of the Contacts View (in Nextcloud contatcs) look for a little impeller symbol that looks like this:

which will display and URL that looks something like this: https://cloud.nextcloud.com/remote.php/dav/addressbooks/users/daniel/Thunderbird/
- Launch the Windows 10 People app. Then, click the settings icon (gear icon) and select “Manage accounts”.
- Click “Add account” and choose “iCloud”.
- Enter an email, username and password. None of this information has to be valid-it will all be changed in the upcoming steps.
- Click “Done”. A message should appear indicating the settings were saved successfully.
- In the “Manage Accounts” menu, click on the iCloud account created in previous steps, and select “Change settings”. Then, click on “Change mailbox sync settings”.
- Scroll to the bottom of the dialog box, select “Advanced mailbox settings”. Paste your CalDAV URL in the field labelled “Contacts server (CalDAV)”.
- Click “Done”. Enter your Nextcloud username and password in the appropriate fields, and change the account name to whatever you prefer (e. g. “Nextcloud Contacts”). Click “Save”.
Troubleshooting
After following all these steps, your Nextcloud calendar should synchronise. If not, check your username and password. Otherwise, repeat these steps.
You will not be able to synchronise your calendar if you have two-factor authentication enabled. Follow the steps below to get an app password that can be used with the Calendar client app:
- Log into Nextcloud. Click on your user icon, then click on “settings”.
- Click on “Security”, then locate a button labeled “Generate app password”. Next to this button, enter “Windows 10 Calendar app”. Then, click the button and copy and paste the password. Use this password instead of your Nextcloud password for Step 8.
Special thanks to this Reddit user for their post: https://www.reddit.com/r/Nextcloud/comments/5rcypb/using_the_windows_10_calendar_application_with/
Contacts
- Repeat steps 1 - 7 from the Calendar instructions. If you already have setup the Calendar synchronisation, you can use the same account for this.
- In the “Advanced mailbox settings”. Paste your CalDAV URL in the field labelled “Contact server (CardDAV)”.
- Replace the path “principals” within the URL with “addressbooks”
- Click “Done”. Enter your Nextcloud username and password in the appropriate fields, and change the account name to whatever you prefer (e. g. “Nextcloud”). Click “Save”.
Synchronising with other apps and devices
Please refer to the Nextcloud manual for how to link Mail, Calendar and Contacts to Thunderbird, KDE Kontact and GNOME.
Documents, Spreadsheets and Presentations
Nextcloud on the gE.CO toolbox uses Collabora integration for documents, spreadsheets and presentations. These are designed to be easy to use, being based on familiar applications for composing documents, spreadsheets and presentations.
More detailed information on how to use these tools is coming soon. In the meantime, please refer to the Collabora manual for instructions and troubleshooting.
Nextcloud Talk and Nextcloud Forms
Instructions on how to use these tools is coming soon.
Setting your preferences
As a user, you can manage your personal settings.
To access your personal settings:
-
Click on your profile picture in the top, right corner of your Nextcloud instance.
The Personal Settings Menu opens.

Personal Settings Menu
-
Choose Settings from the drop down menu.

You should see most of the below options listed in the Personal Settings Page. Some of the features you will see include the following:
- Usage and available quota
- Manage your profile picture
- Full name (You can make this anything you want, as it is separate from your Nextcloud login name, which is unique and cannot be changed)
- Email address
- List of your Group memberships
- Change your password
- Using two-factor authentication
- Setting your preferences
- Choose the language for your Nextcloud interface
- Links to desktop and mobile apps
- Manage your Activity stream and notifications
- Default folder to save new documents to
- Your Federated sharing ID
- Social sharing links
- Nextcloud version
NOTE
There may be more options and settings available. Please contact ge.CO toolbox support for more information.
Using two-factor authentication
Two-factor authentication (2FA) is a way to protect your Nextcloud account against unauthorised access. It works by requiring two different ‘proofs’ of your identity. For example, something you know (like a password) and something you have like a physical key. Typically, the first factor is a password like you already have and the second can be a text message you receive or a code you generate on your phone or another device (something you have).
You can enable and configure two-factor authentication in Setting your preferences. Below you can see how.
Configuring two-factor authentication
In your Personal Settings look up the Two-Factor Authentication setting. In this example this is TOTP, a Google Authenticator compatible time-based code.

You will see your secret and a QR code which can be scanned by the TOTP app on your phone (or another device). Depending on the app or tool, type in the code or scan the QR and your device will show a login code which changes every 30 seconds.
Recovery codes in case you lost your 2nd factor
You should always generate backup codes for 2FA. If your 2nd factor device gets stolen or is not working, you will be able to use one of these codes to unlock your account. It effectively functions as a backup 2nd factor. To get the backup codes, go to your Personal Settings and look under Second-factor Auth settings. Choose Generate backup codes.

You will then be presented with a list of one-time-use backup codes.

You should put these codes in a safe spot, somewhere you can find them. Don’t put them together with your 2nd factor like your mobile phone but make sure that if you lose one, you still have the other. Keeping them at home is probably the best thing to do.
Logging in with two-factor authentication
After you have logged out and need to log in again, you will see a request to enter the TOTP code in your browser. If you enable not only the TOTP factor but another one, you will see a selection screen on which you can choose two-factor method for this login. Select TOTP.

Now, just enter your code:

If the code was correct you will be redirected to your Nextcloud account.
NOTE
Since the code is time-based, it’s important that your server’s and your smartphone’s clock are almost in sync. A time drift of a few seconds won’t be a problem.
Using two-factor authentication with hardware tokens
You can use two-factor authentication based on hardware tokens. The following devices are known to work:
- TOTP based:
- FIDO U2F based:
Using client applications with two-factor authentication
Once you have enabled 2FA, your clients will no longer be able to connect with just your password unless they also have support for two-factor authentication. To solve this, you should generate device specific passwords for them. See Manage connected browsers and devices for more information on how to do this.
Considerations
If you use WebAuthn to login to your Nextcloud be sure to not use the same token for 2FA. As this would mean you are again only using a single factor.
Manage connected browsers and devices
The personal settings page allows you to have an overview on the connected browsers and devices.
Managing connected browsers
In the list of connected browsers you see which browsers connected to your account recently:

You can use the trash icon to disconnect any of the browsers in the list.
Managing devices
In the list of connected devices you see all the devices and clients you generated a device password for and their last activity:

You can use the trash icon to disconnect any of the devices in the list.
At the bottom of the list you find a button to create a new device-specific password. You can choose a name to identify the token later. The generated password is used for configuring the new client. Ideally, generate individual tokens for every device you connect to your account, so you can disconnect those individually if necessary.

NOTE
You have only access to the device password when creating it, Nextcloud will not save the plain password, hence it’s recommended to enter the password on the new client immediately.
NOTE
If you are using two-factor authentication for your account, device-specific passwords are the only way to configure clients. The server will deny connections of clients using your login password then.
Device-specific passwords and password changes
For password changes in external user backends, the device-specific passwords are marked as invalid, and once a login of the user account with the main password happens, all device-specific passwords are updated and work again.