Introduction
This help guide provides an introduction to using Mattermost as part of the gE.CO toolbox. The text has been adapted from original documentation provided by Mattermost under Creative Commons license (CC-BY-3.0). Full credit is given to the Mattermost community for creating the original documentation.
This help guide is in English, but you can help translate this guide into other languages by contacting the gE.CO toolbox support team at Newcastle University.
About this guide
The original documentation on which this guide is based was written and maintained by the development team at Mattermost and a community of users on Github.
This documentation is relevant to the version of Mattermost that has been used as part of the gE.CO toolbox. However, some things explained about Mattermost elsewhere (such as online help guides) may be different in this version. In addition, this guide may not be relevant for other deployments of Mattermost elsewhere (e.g. on other websites or servers using the "Enterprise Edition").
This guide has been carefully edited to be relevant to users of the gE.CO toolbox. However, the original documentation on which this guide is based was written to explain all features and settings in Mattermost. The gE.CO toolbox version may not have all of these features available. Settings such as storage space, applications and custom colours/styles can vary between realisations of Mattermost, so please bear this in mind.
If you think an edit to this guide is required, please contact the gE.CO toolbox support team at Newcastle University.
Welcome to Mattermost
Mattermost is a modern, digital workspace that will help you be more productive in your day-to-day work life.
It is an open source cloud alternative to proprietary messaging software for teams. The software, developed in partnership with over 500 contributors from around the world, is designed to increase the agility, efficiency and innovation in high trust organisations while keeping data and operations under IT control.
The gE.CO toolbox uses the Mattermost Team Edition. This is a free-to-use, open source, self-hosted alternative to proprietary software. Team Edition is your open source “virtual office”, offering all the core productivity benefits of competing software solutions. The open source Mattermost Team Edition is functionally identical to the commercial Mattermost Enterprise Edition in its free “team mode”, but there is no ability to unlock enterprise features.
Some of the major benefits of using Mattermost include:
- Direct 1:1 and group messaging with your colleagues
- Channels for topic-based, group-based, or meeting-based chat
- Streamlined collaboration on projects
- Reduced email clutter
- Searching across messages and channels
- Sharing files
Feel free to view Mattermost's demo video below.
Accessing the Mattermost workspace
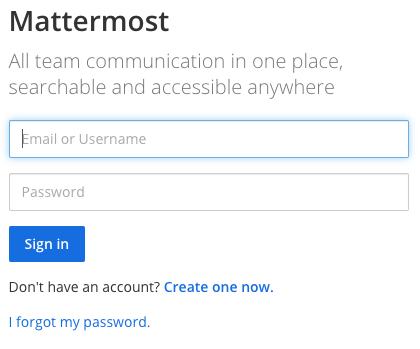
Access Mattermost through the gE.CO toolbox website, on the Services page. Here, you can create an account by clicking 'Create one now'. To create an account, all you need is an email, username and password.
Please note that by proceeding to create your account and use gE.CO Toolbox, you agree to Mattermost's Terms of Service and Privacy Policy. If you do not agree, you cannot use gE.CO Toolbox.
Signing In
To sign in, navigate to the Mattermost sign-in screen here: https://mattermost.gecotoolbox.io. You may have also been invited to join Mattermost through an email invitation.
TIP
We recommend bookmarking the URL for Mattermost on the gE.CO toolbox (https://mattermost.gecotoolbox.io) so signing in to Mattermost is easy in the future.
After signing in, the team that appears first on your team sidebar will open. If you have not joined a team, the Team Selection page opens where you can view a list of teams that you can join.
Email Address or Username Sign In
You can sign in with the username or email address used to create your account.
If you’ve forgotten your password, you can reset it by selecting I forgot my password on the sign-in screen, or contact the gE.CO toolbox support team for help resetting your password.
Single Sign-On
When enabled by the administrator, you can sign in using your GitLab, Google, Office 365, AD/LDAP, or SAML credentials.
This feature is not currently enabled by administrators of the gE.CO toolbox. If this is a feature you would like to see added, please contact the gE.CO toolbox support team.
Switch Between Teams
You can switch between teams you have joined using the team sidebar that appears to the left of your channel list on the left-hand sidebar.

About Teams, Channels, and Messages
This is a what a typical Mattermost workspace looks like:

To understand how Mattermost works, here are the three main parts of Mattermost:
- Teams
- Channels
- Messages
Teams
A team is a digital workspace where you and your teammates can collaborate in Mattermost. Depending on how Mattermost is set up in your organisation, you can belong to one team or multiple teams.
You have the ability to switch back and forth between teams on the Team Sidebar, located on the upper left side of the app.
Channels
Channels are used to organise conversations across different topics. They are located on the left-hand panel of Mattermost.
There are three types of channels: Public Channels, Private Channels, and Direct Messages.

Public Channels
Public Channels are open to everyone on a team. New team members are automatically added to two Public Channels when they sign up: Town Square and Off-Topic.
Public Channels are identified with a globe icon.
Select the More… button at the bottom of the Public Channels section to explore more channels to join!
Private Channels
Private Channels are for sensitive topics and are only visible to selected team members. Any member of a Private Channel can add additional members. Channel members can choose to leave at any time, and any member of a Private Channel can remove other members from the channel.
Private Channels are identified with a lock icon.
Direct and Group Messages
Direct Messages (DMs) are for conversations between two people. Group Messages (GMs) are Direct Messages that have conversations among three or more people. Both are visible only to the people involved.
See Managing channels for more information on Channels and how to manage them.
Messages
Sending messages and replying to messages are important ways to keep conversations active with your team. You can edit and delete messages after you have sent them. You can also share links to any message in Mattermost.
In this example, a release manager is notifying teams about an upcoming release and confirming outstanding tasks:

See Messaging basics for a complete list of messaging basics with instructions.
Log Out of Mattermost Messaging
You can log out from the Main Menu (the three lines next to your username).
Select Logout to log out of all teams on the server.
Work with messages
Messaging Basics
Write messages using the text input box at the bottom of the screen. Press ENTER to send a message. Use SHIFT+ENTER to create a new line without sending a message. To send messages on CTRL+ENTER and use ENTER to insert new lines go to Main Menu > Account Settings > Advanced > Send messages on CTRL+ENTER.
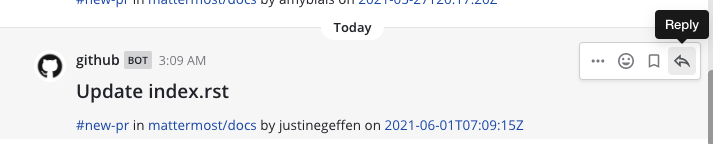
Reply to messages by clicking the reply arrow next to the message text.
![]()
Notify teammates when they are needed by typing @username.
Format your messages using Markdown that supports text styling, headings, links, emojis, code blocks, block quotes, tables, lists, and in-line images.
You can use either _ or * for italics and bold text. See the table below for examples.
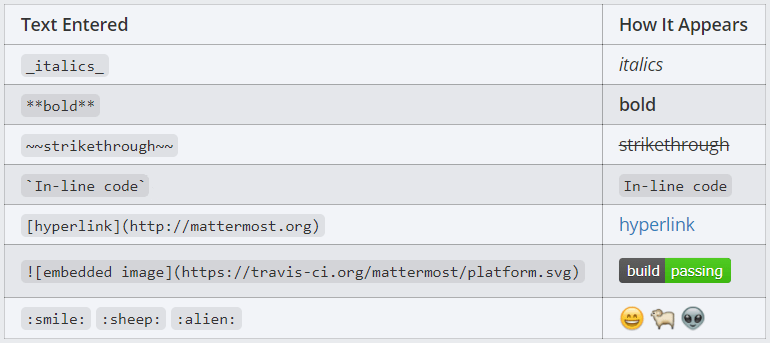
Quickly add emojis by typing “:” followed by two characters, which will open an emoji autocomplete. If the existing emojis don’t cover what you want to express, you can also create your own Custom Emoji.
Attach files by dragging and dropping them into Mattermost or clicking the attachment icon in the text input box.
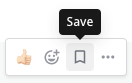
Save messages for follow up using the Save icon next to the message.
Sending and Receiving Messages
Sending messages and replying to messages are important ways to keep conversations active with your team. You can edit and delete messages after you have sent them. You can also share links to any message in Mattermost.
Send a Message
Write a message by typing into the text input box, then press ENTER to send it. Use SHIFT+ENTER to create a new line without sending a message. To send messages by pressing CTRL+ENTER, go to Main Menu > Account Settings > Advanced > Send Messages on CTRL/CMD+ENTER > Edit.
Reply to Messages
You can reply to a message by hovering over a message and selecting the Reply link to organise the conversation into a thread.
Threaded conversations are easy to follow and allow multiple parallel conversations to occur at the same time without confusion. Replies are indented slightly in the centre pane to indicate that they are child messages of a parent message.
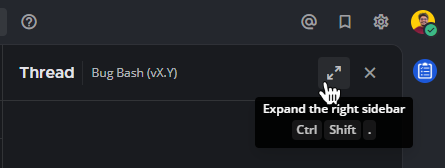
Selecting the reply link opens a sidebar in the right-hand sidebar. To expand the right-hand sidebar to its full width, select the Expand icon with two arrows at the top of the sidebar.
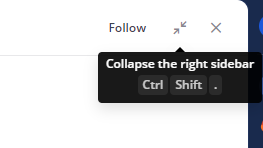
To shrink the right-hand sidebar to its original width, select the same Collapse icon.
Edit or Delete Messages
Select the More Actions link next to a message that you’ve sent.

Select Edit to edit your own messages. Message edits do not trigger new @mention notifications, desktop notifications, or notification sounds.
Select Delete to delete your own messages. Select Delete again to confirm.
Link to Messages
Select the More Actions link next to a message, then select Copy Link. Paste the link into a message.
If the link is to a message in a Public Channel, any member of the team can see the message. If the link is to a message in a Private Channel, only members in that channel can see the message.
TIP
The timestamp next to the username of any message also functionas as a permanent link to that conversation.
Mark Messages as Unread
Marking a message as unread bolds the channel in your sidebar, and adds the new messages line above the marked message. This can be a useful reminder to follow-up on the message later if you don’t have time to address it when the message was read.
Select the More Actions link next to a message, then select Mark as Unread.
Start or Reply to Threads
Replies are collapsed under the first message of a thread. To reply to a thread, select the Reply icon, or select the reply count if a thread already exists.
TIP
- Select anywhere on a message in a channel to view it, or reply to it, on the right-hand side.
- In channels, a dot next to the thread participants indicates there are unread replies. You’ll only see unreads for threads you’re following.

Follow Threads and Messages
You can follow particular messages and threads so that any reply activity triggers notifications. Follow or unfollow any thread, at any time, by toggling the thread’s Follow/Following indicator, or by accessing the More Actions menu.

You’ll automatically follow every thread you participate or are mentioned in. If you’re no longer interested in a or message thread, you can unfollow it to stop receiving notifications. Viewing a thread without responding to it doesn’t automatically follow that thread.

TIP
Follow messages with no replies from the More Actions menu to be notified if someone replies to the message later.
View All Threads
Select Threads at the top of the channel sidebar to see all your followed threads on the currently selected team. Threads with the most recent replies display at the top of the list.
Select Unreads to filter your followed threads by only those with unread replies.

Tutorial Video
For additional details about working with the Beta release of Collapsed Reply Threads, see our tutorial video on YouTube.
Formatting text
Markdown makes it easy to format messages. Type a message as you normally would, then use these the following formatting syntax to render the message a specific way. For a guide to using Markdown in Mattermost, see this blog post.
Text Style
You can use either _ or * around a word or phrase to make it italic, or __ or ** around a word or phrase to make it bold. You can also use common keyboard shortcuts, including CTRL/CMD+B to bold, and CTRL/CMD+I to italicize text.
*italics*(or_italics_) renders as italics**bold**renders as bold***bold-italic***renders as
~~strikethrough~~renders as
Links
Create labeled links by putting the desired text in square brackets [ ] and the associated link in round brackets ( ).
[Check out Mattermost!](https://about.mattermost.com/)
Renders as: Check out Mattermost!
Headings
Make a heading by typing # and a space before your title. For smaller headings, use more #’s.
## Large Heading
### Smaller Heading
#### Even Smaller Heading
Renders as:
Alternatively, you can underline the text using equal signs === or hyphens --- to create headings.
Large Heading
-------------
Renders as:
Lists
Create a list by using asterisks *, hyphens -, and/or plus signs + interchangeably as bullets. Indent bullet points by adding two spaces in front each one.
* item one
- item two
  + item two sub-point
Renders as:
- item one
- item two
- item two sub-point
Make an ordered list by using numbers instead:
1. Item one
1. Item two
1. item three
Renders as:
- Item one
- Item two
- Item three
You can also start a list at any number:
4. The first list number is 4.
1. The second list number is 5.
1. The third list number is 6.
Renders as:
- The first list number is 4.
- The second list number is 5.
- The third list number is 6.
Make a task list by including square brackets [ ]. Mark a task as complete by adding an x.
- [ ] Item one
- [ ] Item two
- [x] Completed item
Renders as:
Code Block
Creating a fixed-width code block is recommended for pasting multi-line blocks of code or other text output because it’s easier to read with fixed-width font alignment. Examples include block text snippets, ASCII tables, and log files.
This can be accomplished by placing three backticks ``` on the line directly above and directly below your code:
```
this is my
code block
```
TIP
Type three backticks
\\\, press SHIFT+ENTER,<type_your_code>, press SHIFT+ENTER again, then type three more backticks\\\.Or by indenting each line by four spaces:
    this is my
    code block

^^^^ 4x spaces
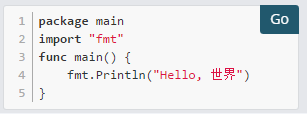
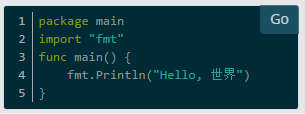
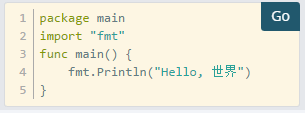
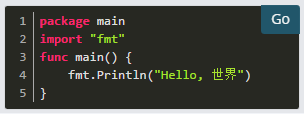
Syntax highlighting
To add syntax highlighting, type the language to be highlighted after the ``` at the beginning of the code block. Mattermost also offers four different code themes (GitHub, Solarized Dark, Solarized Light, and Monokai) that can be changed in Account Settings > Display > Theme > Custom Theme > Centre Channel Styles.
Supported languages include: applescript, as, atom, bas, bash, boot, _coffee, c++, c, cake, cc, cl2, clj, cljc, cljs, cljs.hl, cljscm, cljx, cjsx, cson, coffee, cpp, cs, csharp, css, d, dart, dfm, di, delphi, diff, django, docker, dockerfile, dpr, erl, fortran, freepascal, fs, fsharp, gcode, gemspec, go, groovy, gyp, h++, h,handlebars, hbs, hic, hpp, html, html.handlebars, html.hbs, hs, hx, iced, irb, java, jinja, jl, js, json, jsp, jsx, kt, ktm, kts, latexcode, lazarus, less, lfm, lisp, lpr,lua, m, mak, matlab, md, mk, mkd, mkdown, ml, mm, nc, objc, obj-c, osascript, pas, pascal, perl, pgsql, php, php3, php4, php5, php6, pl, plist, podspec, postgres, postgresql, ps, ps1, pp, py, r, rb, rs, rss, ruby, scala, scm, scpt, scss, sh, sld, st, styl, sql, swift, tex, texcode, thor, ts, tsx, v, vb, vbnet, vbs, veo, xhtml, xml, xsl, yaml, and zsh.
Example:
``` go
package main
import "fmt"
func main() {
    fmt.Println("Hello, 世界")
}
```
Renders as:
GitHub Theme
Solarized Dark Theme
Solarized Light Theme
Monokai Theme
In-line Code
Create in-line monospaced code text by surrounding it with backticks ```. Don’t use single quotes '.
`monospace`
Renders as: monospace.
In-line Images
In-line images are images added within lines of text. From Mattermost Server v5.35 and in Mattermost Cloud, you can control whether all in-line images over 100px in height are automatically collapsed or expanded in messages by setting a user preference, or by using the /collapse and /expand slash commands.
To add in-line images to text, use an exclamation mark ! followed by the alt text in square brackets [ ], then the image URL in round brackets ( ). You can add hover text after the link by placing the text in quotes " ".
Example:

If the height of the original image is more than 500 pixels, Mattermost sets the image height at 500 pixels and adjusts the width to maintain the original aspect ratio.
You can set the width and height of the displayed image after the URL of the image by using an equals sign = followed by values for both width and height ##x##. If you set only the width, Mattermost adjusts the height to maintain the original aspect ratio.
Warning
The native apps do not support fixed width and height and will display the full-size image.
Examples:
.. |mattermost-icon-76x76| image:: ../images/icon-76x76.png
.. |mattermost-icon-50x76| image:: ../images/icon-50x76.png
In-line image with hover text

Renders as:
In-line image with link
Note
An extra set of square brackets [ ] is required around the alt text, and round brackets ( ) are required around the image link.
[](https://github.com/mattermost/mattermost-server)
Renders as:
In-line image displayed with fixed width and height
Example: An in-line image that’s 50 pixels wide and 76 pixels high.

Renders as:
In-line image displayed with fixed width
Example: An in-line image that’s 50 pixels wide where the system adjusts the height to maintain the original aspect ratio.

Renders as:
Lines
Create a line by using three *, _, or -.
***
Renders as:
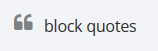
Block quotes
Create block quotes using >.
> block quotes renders as:
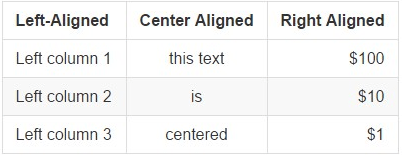
Tables
Create a table by placing a dashed line --- under the header row, then separating each column with using pipes |. The columns don’t need to line up exactly. Choose how to align table columns by including colons : within the header row.
| Left-Aligned  | Centre Aligned  | Right Aligned |
| :------------ |:---------------:| -----:|
| Left column 1 | this text       |  $100 |
| Left column 2 | is              |   $10 |
| Left column 3 | centred         |    $1 |
Renders as:
Using Emojis
Emojis are small, digital images or icons used to communicate or express concepts such as emotions and physical gestures in your messages.
Adding Emojis to messages
Selecting an Emoji
Select the Smile icon inside the Mattermost message input box to open the Emoji Picker.

Selecting a Default Skin Tone
Select the Skin Tone icon in the top right corner of the Emoji Picker to specify a preferred skin tone for people-based emojis.
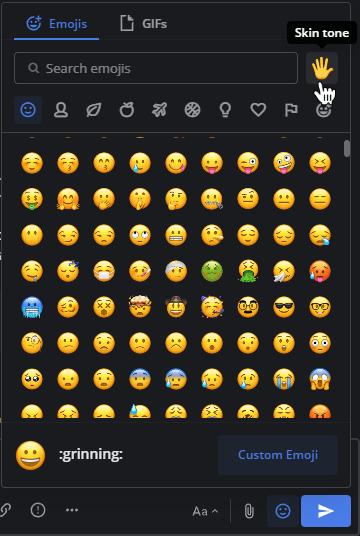
Typing an Emoji
Alternatively, open the emoji autocomplete by typing : followed by at least two characters of the word describing the emoji. Descriptions include skin tone details for people-based emojis, where supported.
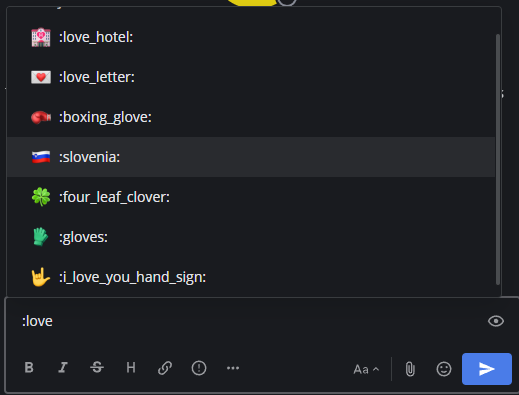
It’s also possible to create your own custom emoji if the emoji you want to use doesn’t exist.
Creating Custom Emojis
You can create Custom Emojis which are available to everyone on your Mattermost server. From the Emoji Picker, select Custom Emoji. Small, square pictures work best when selecting an image to upload. The file can be any JPG, GIF, or PNG and up to 1 MB in size.
- Enter a name for your Custom Emoji. This is the name that will show up in the emoji autocomplete.
- Choose Select, then select the image to use for the emoji.
- Select Save.
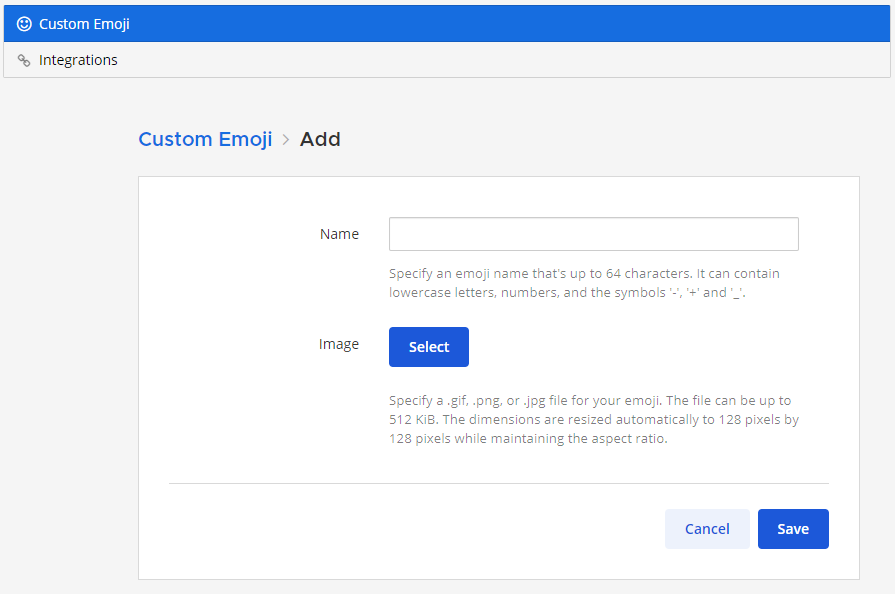
Once saved, your emoji is added to the list of Custom Emoji.
NOTE
If you can’t see the Custom Emoji option, then please contact the gE.CO toolbox support team.
For further assistance, review the Troubleshooting forum for previously reported errors, or join the Mattermost user community for troubleshooting help.
Using Custom Emojis
To use your Custom Emoji in a message, simply type : followed by your emoji name to bring it up in the emoji autocomplete. Other users on the site will also be able to see your emoji in the autocomplete, and will be able to use it in their own messages.
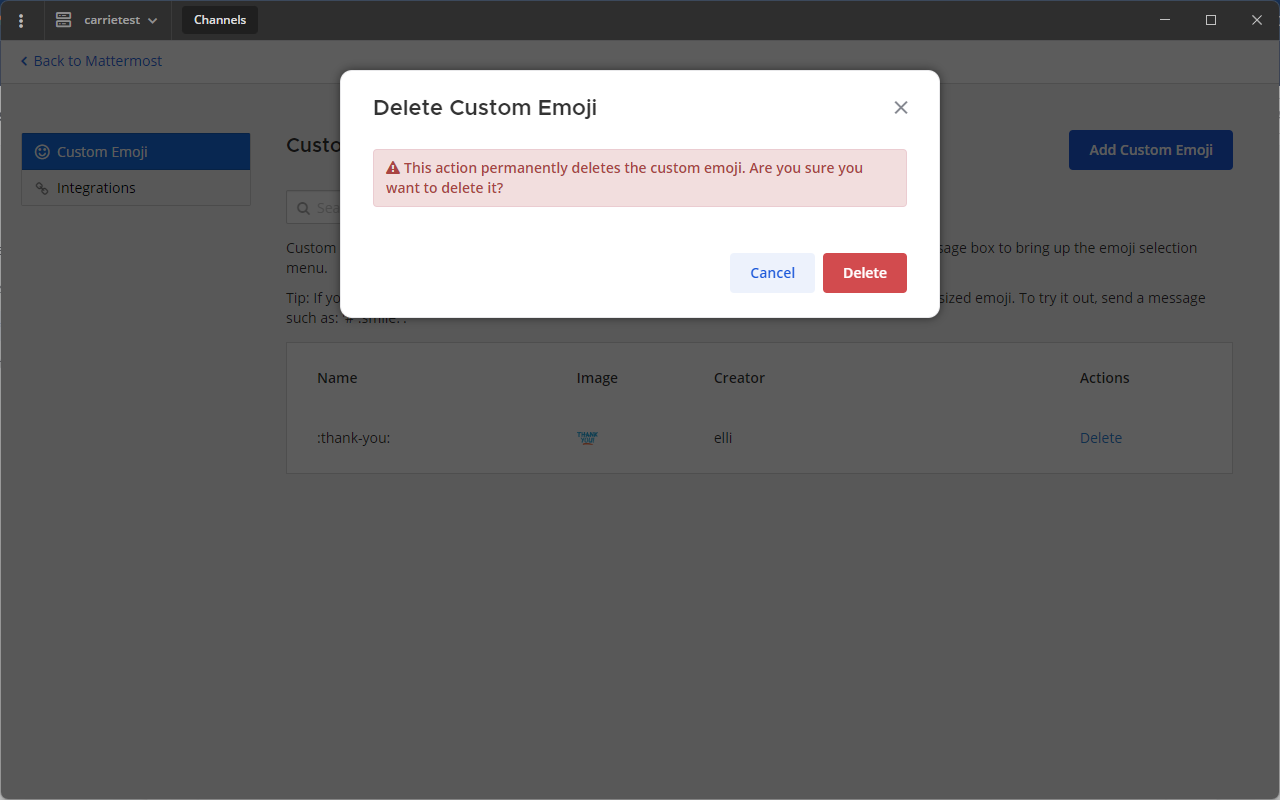
Deleting Custom Emojis
You can delete Custom Emojis that you created.
- Open the Main Menu at the top-right of the channels sidebar.
- Select Custom Emoji.
- If required, use the Search Bar to find your Custom Emoji in the list.
- Under Actions select Delete.
- Choose Delete to confirm.
Mentioning Teammates
@Mentions
Use @mentions to get the attention of specific team members.
NOTE
Editing an existing message does not trigger new @mention notifications, desktop notifications, or notification sounds.
@username
You can mention a teammate by using the @ symbol plus their username to send them a mention notification.
Type @ to bring up a list of team members who can be mentioned. To filter the list, type the first few letters of any username, first name, last name, or nickname. Use the UP and DOWN arrow keys to scroll through entries in the list, and then press ENTER to select the person to mention. When selected, the username replaces the full name or nickname.
The following example sends a special mention notification to Alice, whose username is alice. The notification alerts her of the channel and message where she was mentioned. If Alice is away from Mattermost and has email notifications turned on, she’ll receive an email alert of her mention along with the message text.
@alice how did your interview go with the new candidate?
If the person you mentioned does not belong to the channel, a System Message is posted to let you know. This is a temporary message, and you are the only one who can see it. To add the mentioned person to the channel, open the dropdown menu next to the channel name and select Add Members.
@channel and @all
You can mention an entire channel by typing @channel or @all. All members of the channel receive a mention notification that behaves the same way as if the members had been mentioned personally. If used in Town Square, it notifies all members of your team.
You can ignore channel-wide mentions in specific channels in the Channel Menu > Notification Preferences > Ignore mentions for @channel, @here and @all.
@channel great work on interviews this week. I think we found some excellent potential candidates!
If a channel has five or more members, you’re prompted to confirm that you want notifications sent to everyone in the channel.
@here
You can mention everyone who is online in a channel by typing @here. This sends a desktop notification and push notification to members of the channel who are online. It’s counted as a mention in the sidebar. Members who are offline don’t receive a notification. When they return to Mattermost they won’t see a mention counted in the channel sidebar. Members who are away receive a desktop notification only if they have notifications set to For all activity, and they won’t see a mention counted in the sidebar.
@here can someone do a quick review of this?
You can ignore channel-wide mentions in specific channels in the Channel Menu > Notification Preferences > Ignore mentions for @channel, @here and @all.
@groupname (Beta)
Once this feature is enabled, for a specific group, users can mention and notify the entire group in a channel (similar to @channel or @all). Members of the group in that channel will receive a notification. If members of the group mentioned are not members of the channel, the user who posted the mention is prompted to invite them.
Group mention identifiers (slugs) use the LDAP group name by default. To customize/rename the slug:
- Open System Console > Groups (Beta).
- Select Edit next to the group you want to edit.
- In Group Profile > Group Mention enter the new slug.
- Select Save.
As with @username mentions, use @ to bring up a list of groups that can be mentioned. To filter the list, type the first few letters of any group. Use the UP and DOWN arrow keys to scroll through entries in the list, and then press ENTER to select the group you want to mention.
@dev-managers great work hitting all of our code coverage goals this quarter!
Words That Trigger Mentions
You can customize words that trigger mention notifications in Account Settings > Notifications > Words That Trigger Mentions. By default, you receive mention notifications for your username and for @channel, @all and @here. You can choose to have your first name be a word that triggers mentions.
You can add a list of customized words to get mention notifications for by typing them into the input box, separated by commas. This is useful if you want to be notified of all posts on certain topics, such as “interviewing” or “marketing”.
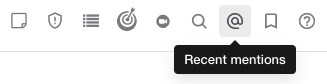
Recent Mentions
Select @ next to the Search box to query for your most recent @mentions and words that trigger mentions (excluding LDAP group mentions).
Select Jump next to a search result in the right-hand sidebar to jump the centre pane to the channel and location of the message with the mention.
Confirmation Dialog Warnings
For any mention that will trigger notifications for more than five users, the user posting the mention must confirm the action before sending the notifications.
If you find this feature has not been enabled for you, please contact the gE.CO toolbox support team.
Highlighting
Valid mentions will have highlighted font text with some exceptions, for example if mentions are disabled at the channel level. The highlighted text becomes a hyperlink when a username is displayed. When the username is selected, the profile popover is displayed.
When mentions trigger a notification, the user being notified will see highlighted font text and highlighted font background. This functions as an identifier of which mentions in the post triggered a notification for the user.
Sharing Files
With file attachments, you can share additional information that will help your team to visually understand your ideas. Sharing videos, voice recordings, screenshots, and photos will make your messages more effective and clear.
Attach Files to Messages
You can attach files to messages in the following ways:
- Use the attachment icon - select the paperclip icon inside the message input box
- Drag and drop
- Paste from the clipboard
Preview File Attachments
Mattermost has a built-in file previewer that you can use to:
- Download files
- Share public links
- View media
Select the thumbnail of an attached file to open it in the file previewer.
Downloading Files
You can download an attached file by selecting the download icon next to the file thumbnail.
Sharing Public Links
Public URLs allow you to share attachments with anyone outside the Mattermost system. To share an attachment, select the thumbnail of an attachment, then select Get Public Link.
TIP
If Get Public Link is not visible in the file previewer, and you prefer that the feature is enabled, you can request to enable the feature by contacting the gE.CO toolbox support team.
Viewing Media
The following media formats are supported on most browsers:
- Images: BMP, GIF, JPG, JPEG, PNG, SVG
- Video: MP4
- Audio: MP3, M4A
- Files: PDF, TXT
Other document previews (such as Word, Excel, or PPT) are not yet supported.
Attachment Limits and Sizes
Up to five files can be attached per post. The default maximum file size is 100 MB, but this can be changed by contacting the gE.CO toolbox support team.
Image files can be a maximum size of 6048 pixels x 4032 pixels, or 24 MP (mega pixels), or a raw image file size of approximately 36 MB.
Executing Commands
Slash commands perform operations in Mattermost by typing into the text input box. Enter a / followed by a command and some arguments to perform actions.
Built-in slash commands come with all Mattermost installations and custom slash commands are configurable to interact with external applications. Learn about configuring custom slash commands on the developer slash command documentation page.
Built-in Commands
The following slash commands are available on all Mattermost installations:
| Command | Description | Example |
|---|---|---|
| /away | Set your availability to away | /away |
| /offline | Set your availability to offline | /offline |
| /online | Set your availability to online | /online |
| /dnd | Set your availability to Do Not Disturb | /dnd |
| /code {text} | Display text as a code block | /code File bugs |
| /collapse | Turn on auto-collapsing of image previews, image attachments, as well as in-line images over 100px in height | /collapse |
| /expand | Turn off auto-collapsing of image previews, image attachments, as well as in-line images over 100px in height | /expand |
| /echo {message} {delay in seconds} | Echo back text from your account | /echo Hello World 5 |
| /header {text} | Edit the channel header | /header File bugs here |
| /invite @{user} ~{channel-name} | Invite user to the channel | /invite @john ~sampleChannel |
| /purpose {text} | Edit the channel purpose | /purpose A channel to discuss bugs |
| /rename {text} | Rename the channel | /rename Developers |
| /help | Open the Mattermost help page | /help |
| /invite_people {name@domain.com …} | Send an email invite to your Mattermost team | /invite_people john@example.com |
| /kick {@username} | Remove a member from a public or private channel | /kick @alice |
| /remove {@username} | Remove a member from a public or private channel | /remove @alice |
| /join {channel-name} | Join the open channel | /join off-topic |
| /open {channel-name} | Join the open channel | /open off-topic |
| /leave | Leave the current channel | /leave |
| /mute | Turns off desktop, email and push notifications for the current channel or the [channel] specified | /mute ~[channel] |
| /logout | Log out of Mattermost | /logout |
| /me {message} | Do an action | /me Hello World |
| /msg {@username} {message} | Send a Direct Message to a user | /msg @alice hello |
| /groupmsg {@username1, @username2, …} {message} | Sends a Group Message to the specified users | /groupmsg @alice, @bob hello |
| /search {text} | Search text in messages | /search meeting |
| /settings | Open the Account Settings dialog | /settings |
| /shortcuts | Display a list of keyboard shortcuts | /shortcuts |
| /shrug {message} | Add ¯\_(ツ)_/¯to your message |
/shrug oh well |
| /status {emoji_name} {descriptive status_message} | Set a custom status that includes an optional emoji and a descriptive status message | /status sick Feeling unwell and taking time off to recover |
| /status clear | Clear the current status | /status clear |
Begin by typing / and a list of slash command options appears above the text input box. The autocomplete suggestions help by providing a format example in black text and a short description of the slash command in grey text.

NOTE
Custom status slash commands marked with an asterisk (*) in the table above will be available in the Mattermost Mobile App in a future release.
Custom Commands
Custom slash commands integrate with external applications. For example, a team might configure a custom slash command to check internal health records with /patient joe smith or check the weekly weather forecast in a city with /weather toronto week. Check with the gE.CO toolbox support team or open the autocomplete list by typing / to determine if your team configured any custom slash commands.
Saving Messages
Saving a message helps you mark messages for follow up. Your saved messages are personal, and can’t be seen by other users. There’s no limit to the number of posts you can save.
One way to use saved messages is to mark messages you want to respond to later. You can save the post in the list of Saved Posts, refer back to it later, and once complete, you can remove it from the list.
Saving a Message
To try it out, hover over a message to show the Save icon. Click the icon to save the message for follow up.
Viewing Saved Messages
To view a list of your Saved Posts, select the Save icon at the top of the channel.

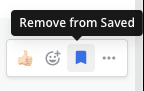
Unsaving Messages
To remove an item from the Saved Posts list, select the Save icon next to message to clear it.
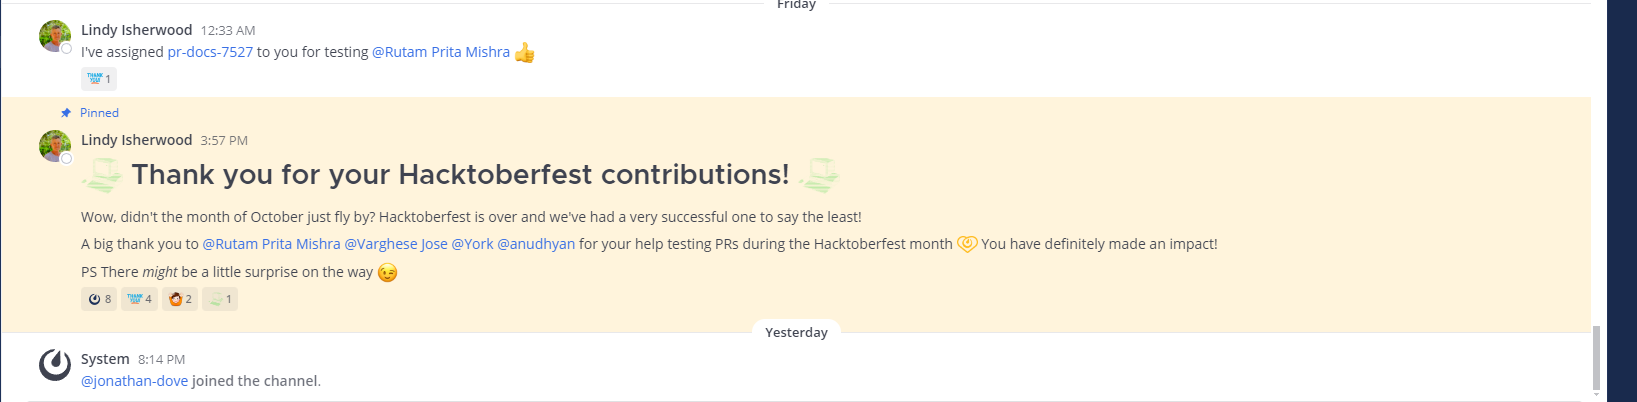
Pinning Messages
All members of a channel can pin important or useful messages to that channel. The list of pinned messages is visible to all channel members. There is no limit to the number of pinned posts in a channel.
Pinned messages are marked with the pinned icon. For example:
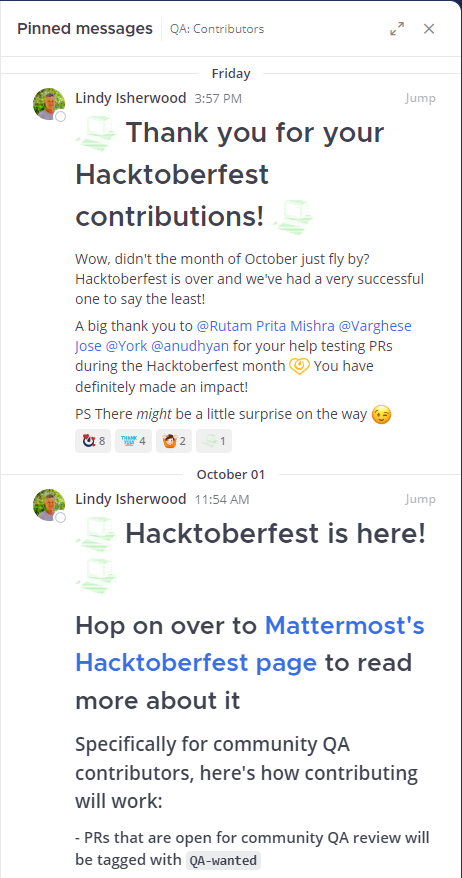
To view the list of pinned messages:
To view the complete list of pinned messages, select the Pin icon in the channel header.

The right-hand sidebar opens to show the list of pinned messages. For example:
Pin a Message
- Mouse over the message that you want to pin. The […] link appears.
- Select […] > Pin to channel
Unpin a Message
- Mouse over the message that you want to unpin. The […] link appears.
- Select […] > Unpin from channel
Searching
Use the Mattermost Search field to find messages, replies, and the contents of files shared across all channels you’re a member of in your team’s conversation history. File content search is available now in Mattermost Cloud, and in Mattermost Server from v5.35, with mobile support coming soon.

You can also do more advanced search using search modifiers.
Searching for Message Contents
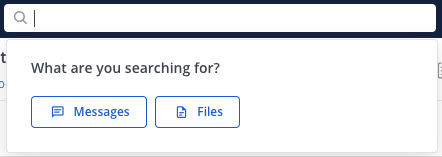
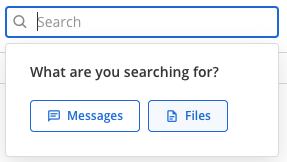
Select the Search field, then type your search criteria.
When message results display in the Search Results pane, select Jump to view the full message in context.
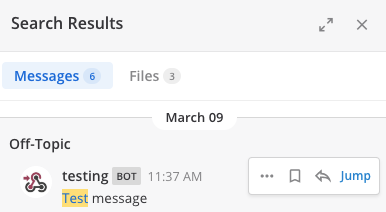
TIP
Message results return first automatically if a message search isn’t specified. In the Search Results pane, select Messages or Files to switch between results.
Searching for File Contents
Select the Search field, select Files, then type your search criteria.
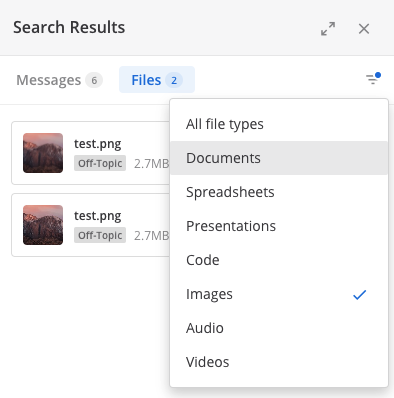
File contents that match on file name, or contain matching text content within supported document types, are returned in the Search Results pane. Each search result includes file name, extension, and size details, as well as details about when and where the file was originally shared.
Supported document file formats include PDF, PPTX, ODT, HTML, and plain text documents.
To narrow search results further, in the Search Results pane, select the File Type Filter option, then select specific file types, such as documents, spreadsheets, or images.
TIP
Select the Channel Files icon below the channel name to access files recently shared in that channel.
Search Modifiers
You can apply search modifiers to any search to reduce the number of results returned. Select a search modifier to add it to the Search field. Supported modifiers are described below.
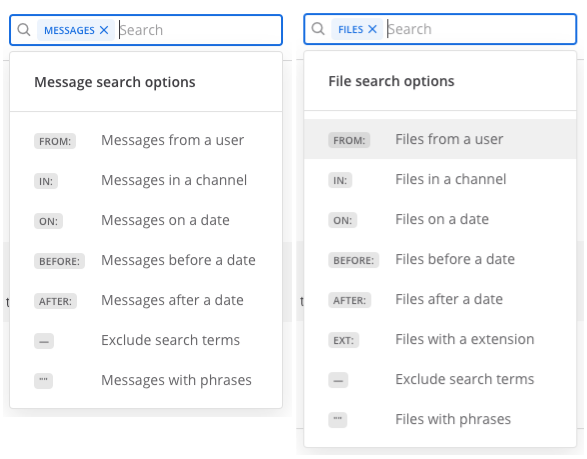
from: and in:
Use from: to find messages or files from specific users. For example, searching from:john.smith only returns content from your Direct Message history with John Smith.
Use in: to find messages or files posted in specific Public channels, Private channels, Direct Messages, or Group Messages. You can specify channels by display name or channel ID. For example, searching Mattermost in:town-square only returns results in the Town Square Public channel that contains the term Mattermost, while searching Mattermost in:john.doe only returns results that contains the term Mattermost in your Direct Message history with John Smith.
before:, after:, and on:
Use before: to find messages or files posted before a specified date.
Use after: to find messages or files posted after a specified date.
Use both before: and after: together to search in a specified date range.
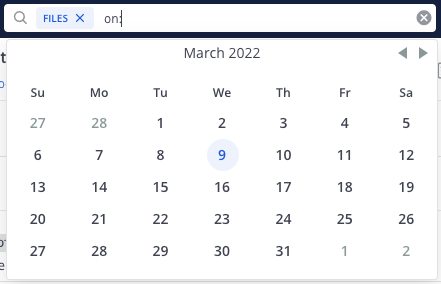
Use on: to find messages files posted on a specific date. Use the date picker to select a date, or type it in YYYY-MM-DD format.
Examples:
- Searching
website before: 2018-09-01returns messages or files containing the termwebsiteposted prior to September 1, 2018. - Searching
website after: 2018-08-01returns messages or files containing the termwebsiteposted after August 1, 2018. - Searching
website before: 2018-09-01 after: 2018-08-01returns all messages or files containing the termwebsiteposted between August 1, 2018 and September 1, 2018. - Searching
website on: 2018-09-01returns messages or files containing the termwebsiteposted on September 1, 2018.
Exclusions
Use the hyphen - symbol to exclude terms from your search results. For example, searching test -release only returns results that include the term test and exclude the term release.
This exclusion modifier can be used in combination with other modifiers to further refine search results. For example, searching test -release -in:release-discussion -from:eric returns all results with the term test, excludes posts with the term release, excludes posts made in the release-discussion channel, and excludes messages sent in Direct Messages by eric.
Quotation Marks
Use quotation marks " " to return search results for exact terms. For example, searching "Mattermost website" returns messages containing the exact phrase Mattermost website, but doesn’t return results containing Mattermost and website as separate terms.
Wildcard
Use the asterisk * symbol for wildcard searches that match within words. For example, searching rea* returns messages or files containing reach, reason, reality, real, and other words starting with rea.
Hashtags
Hashtags are searchable labels for messages. Anyone can create a hashtag in a message by using the pound sign # followed by alphanumeric or other unicode characters. Hashtag examples include: #bug, #marketing, #user_testing, #per.iod, #check-in, #마케팅
Valid hashtags:
- Don’t start with a number.
- Are at least three characters long, excluding the
#. - Are made up of alphanumeric or other unicode characters.
- May contain dots, dashes, or underscores.
To search for messages containing hashtags, select a hashtag in an existing post, or type the hashtag (including the pound # symbol) into the search bar.
NOTE
Hashtags don’t link to channels. If you have a channel named “Marketing”, selecting a
#marketinghashtag does not take you to the Marketing channel. To link to public channels, use the tilde~symbol followed by the channel name. For example~marketing.
Notes About All Searches
- Multiple-word searches return results that contain all of your search criteria.
- Search modifiers can help narrow down searches. See the Search Modifiers section for details.
- You can search Archived channels as long as you’re a member of that channel.
- If you’re unable to see messages or files in archived channels in your search results, please contact the gE.CO toolbox support team.
- To remove archived channels from your search results, you can leave the Archived channels.
- Like many search engines, common words such as
the,which, andare(known as “stop words”), as well as two-letter and one-letter search terms, are not shown in search results because they typically return too many results. - IP addresses (e.g.
10.100.200.101) don’t return results.
Manage Teams, Channels and Members
Creating Teams
A team is a digital workspace where you and your teammates can collaborate in Mattermost.
Methods to Create a Team
If team creation is showing as an option for you, teams can be created from the team sidebar or Main Menu. The person who creates a team will automatically be assigned the Team Admin role for that team.
Team Sidebar
If you belong to more than one team, a team sidebar will appear to the left of your channel list. You can drag teams to reorder them in the sidebar. You can also use keyboard shortcuts to switch teams.

If you have appropriate permissions, select the “+” icon at the bottom of the team sidebar, then select Create a New Team on the team selection page, which guides you through the rest of the team creation steps. If this option is not visible on the web page, then please contact the gE.CO toolbox support team.
If you have no other teams to join, selecting the “+” icon brings you directly to the team creation page if team creation is enabled.
Main Menu
From your current Mattermost team, select the Main Menu > Create a New Team. If this option is not visible in the menu, then please contact the gE.CO toolbox support team.
Team Name and URL Selection
There are a few details and restrictions to consider when selecting a team name and team URL.
Team Name
This is the display name of your team that appears in menus and headings.
- It can contain any letters, numbers or symbols.
- It is case sensitive.
- It must be 2–15 characters in length.
Team URL
The team URL is part of the web address that navigates to your team on the system domain, https://domain.com/teamurl/.
- Teams may contain only lowercase letters, numbers and dashes.
- Teams must start with a letter and cannot end in a dash.
- Teams must be 2–15 characters in length.
- Team names cannot start with the following restricted words:
admin,api,channel,claim,error,files,help,landing,login,mfa,oauth,plug,plugins,post, orsignup.
Best Practices for Using a Single Team vs. Multiple Teams
Mattermost can be deployed both to a single team and to multiple teams.
Currently, we recommend deploying to a single team for the following reasons:
- Single team deployments promote communication across the organisation. When you add multiple teams, groups can become isolated.
- We don’t yet support search or channels across teams, which can impact the cross-team user experience. This includes general searches, saved posts, and recent mentions.
- Integrations (e.g., webhooks and slash commands) are only persistent across single team deployments.
However, some Mattermost customers prefer multiple team deployments for the following reasons:
- Teams are useful when there is a purpose for each of them. For example, one team is used for staff members and another team for external users.
- Performance is better when users are scattered across multiple teams instead of all in the same one. With multiple teams, there is less content to load per team or channel switch and database queries are faster.
- Creating a shared team for all users, and using advanced permissions to control who can create channels and add members to the shared team, improves cross-team collaboration when using multiple teams. Additionally, an annoucement banner can be used to provide system wide announcements.
Team Settings
The Team Settings menu offers Team Administrators and System Administrators the ability to adjust settings applied to a specific team. To access the settings, open the main menu at the top of the channel sidebar and select Team Settings.
General
General settings provide options around how teams are displayed to users.
Team Name
Your Team Name is displayed on the sign-in screen, and in the top of the channel sidebar for your team.
You can enter a name up to 15 characters in length. Please note that some unicode characters are not supported. The length of team names is limited to ensure readability.
Team Description
Your Team Description is displayed when viewing the list of teams available to join and in the tooltip when hovering over the team name in the team sidebar.
You can enter a description up to 50 characters in length. Please note that some unicode characters are not supported.
Team Icon
Your Team Icon appears in the team sidebar, visible if users are members of more than one team.
You can upload a team icon in BMP, JPG or PNG format. Square images with a solid background colour are recommended, since transparency in PNG icons fills with a white background in the team sidebar. Removing the team icon resets it to the default icon that contains the first two letters of the team name.
Allow only users with a specific email domain to join this team
Specifying domains in this setting prevents users from joining the team when their email domain is not on the list. Only users that have an email domain matching the defined domains may join the team.
Users without a matching domain on the team prior to the domain being specified will not be removed after the domain is added.
Allow anyone to join this team
After a user logs in to the site, they are shown a Team Selection page if they don’t belong to a team. Any team with Allow anyone to join this team option set to Yes will show up on this page under “Teams you can join”.
A user can access the Team Selection page by also clicking the “+” icon at the bottom of their team sidebar or from the Main Menu > Join Another Team.
Invite Code
The Invite Code is used as part of the URL in the team invitation link retrieved from the Main Menu > Get Team Invite Link. Click Regenerate to generate a new team invitation link and invalidate the previous link.
Import
Import from Slack (Beta)
You can import channels and users from Slack into Mattermost. Please review Mattermost's documentation on Slack Import for more details.
Managing Channels
Channels can be created, joined, renamed, left, marked as a favourite, muted, unmuted, and archived.
Creating a channel
To create a new Public or Private channel, select the + symbol at the top of the channel sidebar, then select Create New Channel.

Anyone can create Public channels or Private channels.
Creating a Direct or Group Message
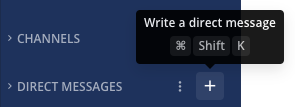
To start a Direct or Group Message, select the + symbol at the top of the channel sidebar, then select Open a Direct Message. Or select the + symbol next to the Direct Messages category in the channel sidebar.
In the Direct Messages popup, identify your most recent conversations by relative timestamps.

Joining a channel
To join a Public channel, select the + symbol at the top of the channel sidebar, then select Browse Channels. Search through the list of Public channels you can join, then select Join.
To join a Private channel, you need to be added to the channel by a member of that channel.
Adding members to a channel
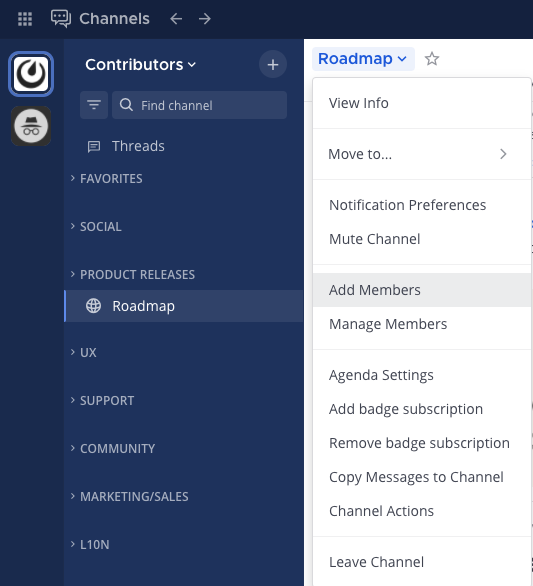
Select the channel name at the top of the centre pane to access the drop-down menu, then select Add Members. Any member of a channel can add new members by choosing Add next to a user’s name. Users already added to the channel will not appear in this list.
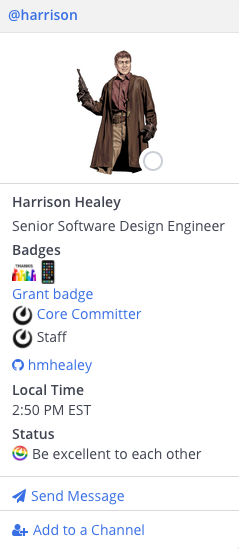
You can also add users to channels within their profile pop-over by choosing Add to a Channel and selecting the channel you want them to join.
Removing members from a channel
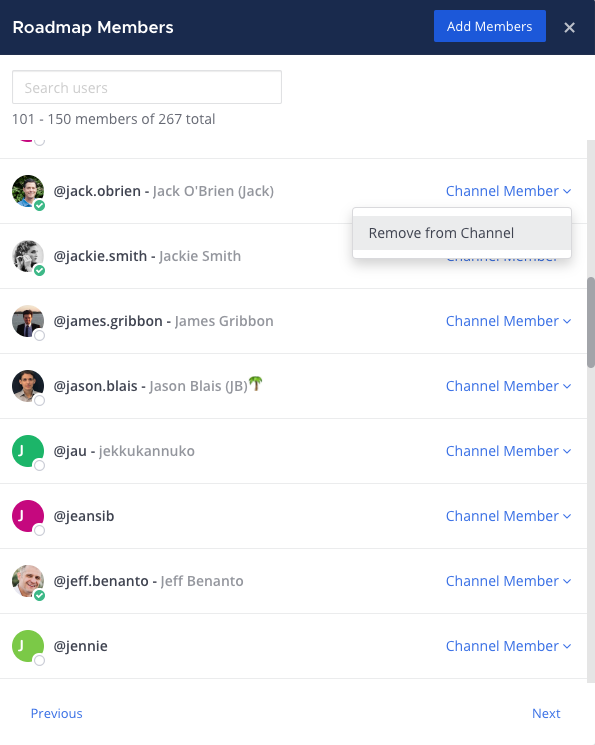
Select the channel name at the top of the centre pane to access the drop-down menu, then select Manage Members. Any member of a channel can remove other members by selecting the member’s channel role, then selecting Remove from Channel.
Naming a channel
Channels can be identified in two ways:
- Channel display name: This appears in the Mattermost user interface. On Desktop, select the channel name at the top of the centre pane to access the drop-down menu, then choose Rename Channel. Anyone can rename the channels they belong to.
- Channel handle: This is part of the channel URL. You can also change the channel handle when renaming a channel, but changing channel handles may break existing links.
For example, for the following channel, https://community.mattermost.com/core/channels/ux-design:
- Channel display name:
UX Design - Channel handle:
ux-design
Leaving a channel
Select the channel name at the top of the centre pane to access the drop-down menu, then select Leave Channel. Any team member who leaves a Private channel must be re-added by another channel member if they wish to rejoin. Team members will not receive mention notifications from channels of which they are not members.
Archiving a channel
Select the channel name at the top of the centre pane to access the drop-down menu, then select Archive Channel. Anyone can archive the Public channels or Private channels they belong to, unless the System Admin has restricted the permissions.
When a channel is archived, it is removed from the user interface, but a copy exists on the server in case it is needed for audit reasons at a later stage. Because of this, the URL of a newly created channel cannot be the same URL name as an archived channel.
In addition to this, when a channel is archived, by default the contents cannot be viewed, shared, or searched. If you want to be able to view or search the channel later, please contact the gE.CO toolbox support team. Alternatively, leave the channel open, but post a message in the channel saying it’s considered archived: such as # This channel is archived..
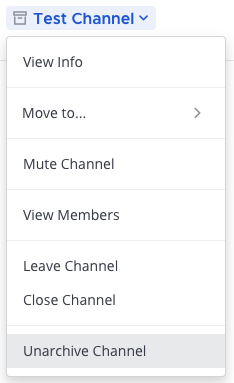
Unarchiving a channel
Search for the channel if required. Then, open the channel, select the channel name at the top of the centre pane to access the drop-down menu and select Unarchive Channel. System Admins and Team Admins can unarchive Public channels or Private channels they belonged to when it was archived.
When a channel is unarchived, channel membership and all its content is restored, unless messages and files have been deleted based on the data retention policy. Please contact the gE.CO toolbox support team for more information about this.
In addition to this, the gE.CO toolbox support team can also unarchive channels.
Converting Public channels to Private channels (and vice versa)
Select the Public channel name at the top of the centre pane to access the drop-down menu, then select Convert to Private Channel. Team and System Admins can convert Public channels to Private channels. Please note that default channels such as TownSquare and Off-Topic cannot be converted to Private channels.
When a channel is converted, its history and membership are preserved. Membership in a Private channel is by invitation only. Publicly-shared files remain accessible to anyone with the link.
NOTE
Due to security concerns with sharing Private channel history, only System Admins can convert Private channels to Public channels via System Console > Channels > Edit (Channel Configuration).
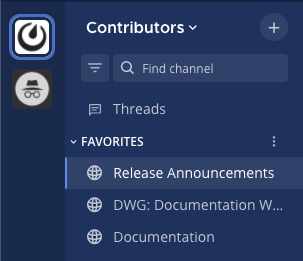
Favouriting a channel
Favourite channels are a great way to organise your channel sidebar by choosing which Public channels, Private channels, and Direct Messages are most important to you.
To mark a channel as a favourite, open the channel:
On desktop: At the top of the page, select on the star icon next to the channel name.

This adds the channel to a Favourites list at the top of the channel sidebar, so it’s easy to access. To remove a channel from the Favourites list, select the star again.
On mobile: Select the channel name at the top of the centre pane to access the drop-down menu, then select Favourite. To remove a channel from the Favourites list, select Favourite again.
Muting and unmuting a channel
Select the channel name at the top of the centre pane to access the drop-down menu, then select Mute Channel.
Once a channel is muted:
- Email, desktop, and push notifications are disabled.
- A mute icon displays next to the channel name.
- The channel appears at reduced opacity in the channel sidebar, and the channel isn’t marked as unread unless you’re mentioned directly.
To unmute the channel, select the channel name again to access the drop-down menu, then select Unmute Channel.
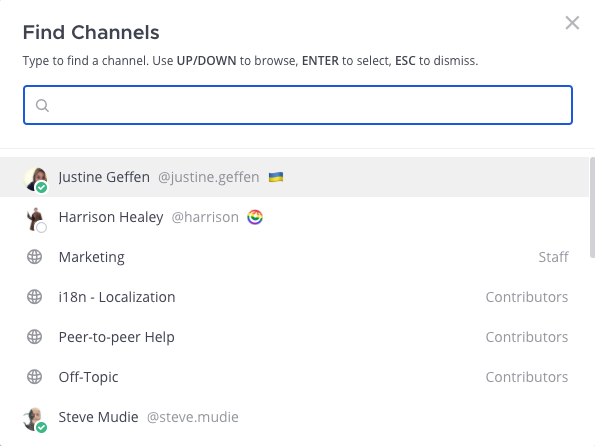
Switching channels
Use the Find channel option in the channel sidebar, or press CMD/CTRL+K, to visit other channels, or to review member availability at a glance.
Navigating recently viewed channels
Use the History arrows at the top of the sidebar to move back and forth through your channel history.
- Select the left arrow to go back one page.
- Select the right arrow to go forward one page.
Organising Mattermost
The importance of organising channels increases as Mattermost spreads to thousands of users.
This document shares best practices from various Mattermost deployments including:
The importance of channel names
Channels organise communication in Mattermost.
When naming or renaming channels, consider the following:
Basic Structure
- Channel names appear in menus where users select which conversations to join.
- Channel names are unique.
- Channel names have a 64 character limit to ensure readability on both desktop and mobile devices.
- An additional 128 characters are available to add a “Channel Purpose” visible when users are selecting channels.
- An additional 1024 characters are available for describing the channel in detail in the “Channel Header”.
Scoping Names
It’s natural to start with broadly defined channels and let them divide into narrower topics as discussions progress.
For example, you might begin with a general “Marketing” channel. As conversations progress, you might divide that channel into: “Marketing: Website”, “Marketing: Social Media”, “Marketing: General”.
TIP
Use colons to separate sections of channel names, rather than
-or>which require more spaces to display.As the organisation grows, disciplines might split across business units, products and geographies, with channel names like “US: Marketing” and “UK: Marketing”.
TIP
If you need to shorten country names, use standard 2-letter country codes.
You can combine the hierarchies, with formats like
[SUB-TEAM]: [TOPIC]: [SUB-TOPIC]. For example:US: Mrkt: WebsiteandUK: Mrkt:Social Media.
TIP
Shorten words, particularly categories, by removing vowels, endings and redundant letter sounds. Example: Turn “Marketing” into “Mrkt”, and “Project” into “Prjt”.
Good naming can take a team up to several thousand channels without significant confusion. Eventually every organisation hits a limit and an additional team might need to be created on the server to accommodate the large number of channels.
How to navigate and organise channels
With guidance on how to set channel names, here are different navigation options and types of channels to consider:
Navigating channels using the keyboard
Keyboard shortcuts allow users to jump between channels.
Entering CTRL+K brings up a dialog where users can type in the first few letters of a channel, triggering auto-complete. Pressing ENTER jumps to the channel directly.
Keeping names clear and short lets users navigate large collections of channels quickly.
TIP
Use ALT+SHIFT+UP and ALT+SHIFT+DOWN to move up and down to the next channel with an unread message.
Topic Channels
Topics are broad categories for organising discussions. Topics are similar to how a user might create a folder for organising emails or documents. Examples: Recruiting, Interviews, Legal Reviews, Documentation
Users can join and leave topic-based channels, as well as add colleagues to have topic-based discussions.
As teams get larger and the number of channels increase, you may start naming topics in a hierarchy to make them easier to find. Examples: Legal: Trademarks, Legal: Contracts, Legal: Licensing.
Meeting Channels
Meeting channels are often used to organise regular meetings. Members can add topics as messages to be discussed during the regular meeting time. Examples: Monday Sales Update, All Hands Meeting.
There are three built-in features to make meetings in Mattermost easier:
- Numbered agenda items in title text
You can number and format messages as agenda items to discuss for the next meeting.
TIP
Try pasting the following as an example in a channel designated for meetings:
#### 1) Agenda item example
#### Commentary about agenda item to be discussed.
- Threaded messaging
On an agenda item message, you can select [...] > Reply to leave comments about an agenda item before or after a meeting to extended discussion.
- Header links
When meeting remotely, add persistent links to your video or audio conferencing solution, like Zoom, Google Hangouts or BlueJeans in the channel header.
When it’s time to meet, your team can click the conference link to connect.
Sub-Team Channels
Sub-teams can include people from the same discipline, project teams, people with the same manager or other groups brought together for a shared purpose. Examples: Developers, Marketers, Offsite Organising Committee, SusanK’s Directs
As sub-teams grow beyond a manageable size for one channel, they can sub-divide. Examples: US: Developers, UK: Developers, SusanK’s Directs, SusanK’s Extended Directs.
Project Channels
Project channels discuss how groups of people come together to achieve specific outcomes. Examples: Logo Design, Localization, Product Launch.
Projects are often private channels rather than public channels and are used to organise a small team around a project brought up in a larger channel. The Project Channel is used to do detailed work, and updates are typically communicated back to larger channels.
Location Channels
If your teams are in different buildings, cities or regions, you can create Location channels to help people coordinate meetings and get-togethers. Examples: Building 10, Palo Alto, Toronto, Delaware.
This helps share announcements and discussions relevant to only those locations.
Data Channels
Data channels allow automatic integration. Information like new or updated support tickets or bug reports, Twitter updates or mentions of your company name in the news can all be made available in channels your team chooses to monitor. There is a wide array of options. Examples: Bugs, Support Tickets, Twitter, News Mentions.
People might use these channels like a daily newspaper, reading about everything that’s happened in the last day, while other configurations allow notifications to alert only when their username or certain key words are mentioned.
Channel naming examples
Here is an example of what a marketer’s channels might look like in a small team:
CHANNELS
- Recruiting
- Interviews
- Marketing
- Sales
- All Hands Meeting
- Town Square
- Off-Topic
PRIVATE CHANNELS
- Website
- Twitter Marketing
- Logo Design
DIRECT MESSAGES
- [Sales People]
- [Marketers]
- [Recruiter]
- [Manager]
Here’s an example of what a marketer’s channels might look like if she was working in the Palo Alto, California office of a large enterprise, working on a product called “Pontoon”:
CHANNELS
- Geo: PA: Recruiting
- Geo: PA: Interviews
- US: Mrkt: General
- US: Sales: West Coast
- US: All Hands
- Town Square
- Off-Topic
PRIVATE CHANNELS
- Pontoon: Mkrt: Website
- Pontoon: Mkrt: Twitter
- Pontoon: Mkrt: Logo Design
DIRECT MESSAGES
- [West Coast Sales People]
- [Marketing Peers]
- [Recruiter for PA office]
- [Manager]
Channel Settings
Notification preferences, channel header, channel purpose, and channel name are customizable for each channel. To access these settings, click the channel name at the top of the page to open the channel menu.
Channel Notification Preferences
Notification preferences can be modified for each channel you belong to.
Mute Channel
By default, channel muting is turned off for all channels. To mute or unmute a channel, click the channel name at the top of the page to access the channel menu, then click Notification Preferences > Mute channel.
Ignore mentions for @channel, @here and @all
By default, you will recieve mention notifications for any uses of @channel, @all or @here in a channel. When enabled, the channel will ignore mention notifications for channel wide mentions. Any messages containing @channel, @all or @here will still mark the channel unread, unless channel mute is enabled.
Send Desktop Notifications
By default, the desktop notification preference assigned in Account Settings is used for all channels. To customize the desktop notification preference for each channel, click the channel name at the top of the page to access the channel menu, then select Notification Preferences > Send Desktop Notifications.
Send Mobile Push Notifications
By default, the mobile push notification preference assigned in Account Settings is used for all channels. To customize the mobile push notification for each channel, click the channel name at the top of the page to access the channel menu, then select Notification Preferences > Send mobile push notifications.
Channel Header
In the channel menu, select Edit Channel Header to change the text that appears next to the channel name at the top of the screen. It can be used to summarize the channel topic or provide links to frequently accessed documents. Any channel member can edit this setting.
Adding links to the Channel Header
Frequently-used links to documents, video calls, or other sites can be added to the channel header using markdown.
Example: Google Hangout
Channel Purpose
In the channel menu, select Edit Channel Purpose to change the text that appears in the More… menu for channels. The channel purpose is usually a short description that helps others decide whether to join the channel. Any channel member can edit this setting.
Channel Name
In the channel menu, select Rename Channel to change the channel name or handle. Changing the channel handle changes the channel URL. Any channel member can edit this setting. Please note that some unicode characters are not supported.
Managing Members
Inviting Team Members
If you have the required permissions, you can add people to your team via a direct invite, a public team invite link, or if they already have an account on the server, you can add them to the team yourself.
The gE.CO toolbox support team can enable guest access. A guest is a special role that is restricted to only the channels they have been invited to. When guest access is enabled, you can invite guests or users external to the organisation, such as vendors or customers.
Direct Invites
Direct invites are invitation emails sent from your team’s server directly to the invited person’s email address. A link within the invitation directs them to an account creation page. Invitation links sent by email expire after 48 hours and can only be used once. A System Admin can invalidate all active invitation links via System Console > Authentication > Signup > Invalidate pending email invites.
Send a direct invite:
- Select your username at the top of the Navigation Panel.
- Select Invite People.
- If there is an option to invite members and guests, choose Invite Members.
- In the Invite People field, enter the email address of the person you want to add.
- Select Invite Members.
Send an invite to a guest:
- Select your username at the top of the Navigation Panel.
- Select Invite People.
- If there is a option to invite members and guests, choose Invite Guests.
- In the Invite People field enter the email address of guest you want to add. You can add multiple email addresses to invite more than one guest.
- Specify the channels the guest will be able to access.
- [Optional] Add a custom message to be included in the invitation to the guest.
- Select Invite Guests.
NOTE
- If you aren’t able to see the Invite Guests option, confirm with gE.CO toolbox support team that you have the correct permissions.
- If you don’t see the Send Email Invite option, confirm with gE.CO toolbox support team that System Console > Authentication > Signup > Enable Email Invitations is set to
true.
Team Invite Link
The team invite link is a unique URL that directs people to an account creation page for a team. A team invite link can be used by anyone and does not change unless it is re-generated by a System Admin or Team Admin via Team Settings > General > Invite Code. For example, the team invite link can be included in a company-wide email to invite all employees to join a Mattermost team.
Get a team invite link:
- Select your username at the top of the Navigation Panel.
- Select Invite People.
- If there is an option to invite members and guests, choose Invite Members.
- Select the Copy Link button to save the URL to your clipboard and share it with those you want to invite to the team.
Adding Someone to Your Team
If someone you want to add to your team already has an account on the server, you can add them to your team without sending an invitation.
Add someone to your team:
- Select your username, at the top of the Navigation Panel.
- Select Invite People.
- If there is an option to invite members and guests, choose Invite Members.
- In the Invite People menu search for the person you want to add. If the people you want to add are not on the list, then they do not have an account on your server.
- Select Invite Members.
Add existing guests to your team:
- Select your username, at the top of the Navigation Panel.
- Select Invite People.
- If there is a option to invite members and guests, choose Invite Guests.
- In the Invite People menu search for the guest you want to add. If the people you want to add are not on the list, then they do not have an account on your server.
- Specify the channels the guest will have access to.
- Select Invite Guests.
NOTE
- If you aren’t able to see the Invite Guests option, confirm with the gE.CO toolbox support team that you have the correct permissions.
- System Admins can view and add team membership to individual users on the user profile page (via System Console > Users > User Profile) by selecting Add Team.
User Roles
There are six types of user roles with different permission levels in Mattermost: System Admins, Team Admins, Channel Admins, Members, Guests, and Inactive accounts. To view a list of users on the team and what their roles are, Team Admins can go to the three dot Main Menu and select Manage Members.
System Admin
The first user added to a newly-installed Mattermost system is assigned the System Admin role. This is the lead administrator of the gE.CO toolbox.
- Access to the System Console from the main menu in any team site.
- Ability to change any setting on the Mattermost server available in the System Console.
- Ability to promote and demote other users from Member role to System Admin role (and vice versa).
- Ability to promote and demote other users to and from Guest role.
- Ability to deactivate user accounts and to reactivate them.
- Access to private channels, but only if given the link to the private channel.
Team Admin
When a team is first created, the person who set it up is made a Team Admin. It is a team-specific role, meaning that someone can be a Team Admin for one team but only a Member on another team. Team Admins have the following privileges:
- Access to the Team Settings menu from the team site main menu.
- Ability to change the team name and import data from Slack export files.
- Access to the Manage Members menu, where they can control whether team members are a Member or a Team Admin.
Member
This is the default role given to users when they join a team. Members have basic permissions on the Mattermost team.
Guest
Guest is a role with restricted permissions, which allow organisations to collaborate with users outside of their organisation, and control what channels they are in and who they can collaborate with.
Guests can:
- Pin messages to channels.
- Use slash commands (with the exception of those used to invite members).
- Favorite channels.
- Mute channels.
- Update their account settings.
Guests cannot:
- Discover public channels.
- Join open teams.
- Create direct messages or group messages with members who aren’t within the same channel.
Deactivating Users
A System Admin can deactivate user accounts via System Console > Users for a list of all users on the server. The list can be searched and filtered to make finding users easier. Select the user’s role and in the menu that opens, then select Deactivate.
When Deactivate is selected, the user is logged out of the system, and receives an error message if they try to log back in. The user no longer appears in channel member lists, and they are removed from the team members list. A deactivated account can also be reactivated from the System Console, in which case the user rejoins channels and teams that they previously belonged to.
Direct Message channels with deactivated users are hidden in users’ sidebars, but can be reopened using the More… button or the Channel Switcher (CMD/CTRL+K).
Mattermost is designed as a system-of-record, so there isn’t an option to delete users from the Mattermost system, as such an operation could compromise the integrity of message archives.
Note that AD/LDAP user accounts cannot be deactivated from Mattermost; they must be deactivated from your Active Directory.
Removing a User from a Team or Leaving a Team
Remove from Team
A Team Admin can remove a user from a team via Main Menu > Manage Members by selecting Remove From Team in the dropdown menu beside a user entry.
When a user is removed from a team, the team will no longer show up in their team sidebar. If they currently have the team open, they are redirected to the first team that appears on their team sidebar. If they didn’t belong to any other teams, the user is sent to the team selection page.
Removing a user from the team does not deactivate the account. The user will still be able to sign in to the site, and join other teams. They will also be able to rejoin the team they were removed from if they receive another invite, or if the team is set to “Allow any user with an account on this server to join this team”. If the user does rejoin the team, they will no longer belong to the channels they were previously a part of, and they will lose all Admin privileges if they had them previously.
Leaving a Team
Users can also choose to remove themselves from a team, from Main Menu > Leave Team. This will remove the user from the team, and from all public channels and private channels on the team.
They will only be able to rejoin the team if it is set to “Allow any user with an account on this server to join this team”, or if they receive a new invite. If they do rejoin, they will no longer be a part of their old channels.
Obtaining User ID
A unique user ID is sometimes required for configuring certain plugins and other administrative tasks that require identifying specific users. This identifier can be found in both the user list as well as the individual profile page for each user via System Console > Users.
Customise Mattermost Messaging
Setting Your Status and Availability
Let your team know whether you’re available by setting a custom status and your availability in Mattermost.
Setting a Custom Status
Set a custom status to add an optional emoji to a descriptive status message. Other members can see your status anywhere they can see your name, such as the channel sidebar and in conversations.
- To set a custom status, select your avatar at the top of the channel sidebar, then select Set a Custom Status.

- Choose from a list of suggested statuses, reuse a recent status, or enter a new emoji and status, then select Set Status. The Speech bubble emoji 💬 is used by default if you don’t specify an emoji. A custom status can be a maximum of 100 characters in length.

NOTE
- If custom statuses aren’t available, you can request the gE.CO toolbox support team to enable this feature in System Console > Site Configuration > Users and Teams > Enable Custom Statuses.
- Custom statuses will be available in the Mattermost Mobile App in a future release.
Clearing a Custom Status
To clear a custom status, select your avatar at the top of the channel sidebar, then select Clear Status, or select the Clear option next to your current status.

Setting Your Availability
To set your availability, select your avatar, then specify your availability as Online, Away, Do Not Disturb, or Offline.

When you set your availability, an availability icon displays next to your name. Setting your availability as Do Not Disturb automatically disables desktop, email, and push notifications.
Other members can see your availability anywhere they can see your name, such as the channel sidebar, within conversations, and within Direct Messages.
How Mattermost Determines Your Availability
| Client | Online | Away | Offline |
|---|---|---|---|
| Desktop App | You’re interacting with your computer | You’re inactive on your computer for 5 minutes | You close Mattermost, sleep, or lock your computer |
| Web Browser | You’re interacting with Mattermost in a browser | You have not typed or switched channels for 5 minutesThe tab is unfocused for 5 minutesThe browser is in the background or minimized for 5 minutes | You close the Mattermost browser window |
| Mobile App | Mattermost is open | Mattermost is open with 5 minutes of inactivity | You switch apps, close Mattermost, or lock your screen |
Configuring Notifications
Notifications in Mattermost alert you to unread messages and mentions. Desktop, email, and mobile push notifications notify you of activity in Mattermost.

You can configure your Mattermost account for how and when you want to be notified of Mattermost activity. When you join a team, Mattermost will notify you of messages directed at you, including when someone:
- Mentions you specifically with @username
- Sends you a Direct Message
- Mentions your username or first name in a channel
- Notifies a channel you’re in using @channel or @all
- Uses any keywords you’ve configured
Desktop Notifications
Desktop notifications are pop-ups that appear in the corner of your main monitor when using Chrome, Firefox, Edge, Safari, or the Mattermost Desktop Apps. You can change the default preference to trigger desktop notifications for all messages sent in channels you’re a member of, or turn them off entirely. You can also choose what sound plays when a desktop notification is triggered on supported browsers and the Mattermost Desktop Apps.

- Configure desktop notifications in Account Settings > Notifications > Desktop Notifications > Send desktop notifications, then choose your sound preference.
- Configure desktop notifications in specific channels in the channel menu via Notification Preferences > Send desktop notifications.
- By default, all channels use the global setting configured in Account Settings.
TIP
Configure desktop notification sounds in Account Settings > Notifications > Desktop notifications > Notification sounds.
Email Notifications
By default, you’ll get email notifications if you’re not actively using Mattermost. You can change the default preference for email notifications to turn them off entirely.

- Configure email notifications in Account Settings > Notifications > Email notifications.
- Configure the email address where notifications are sent in Account Settings > General > Email.
Messages in email notifications can be opened in the Mattermost Desktop App, Mobile App, or in your browser:

Mobile Push Notifications
Mobile push notifications appear on the lock screen of your mobile device if the Mattermost Android or iOS app is installed. By default, these notifications are triggered when you’re not actively using Mattermost, but this is configurable. You can also change the default preference to trigger push notifications for all messages sent in channels you’re a member of, or turn them off entirely.

- Configure push notifications in Account Settings > Notifications > Mobile push notifications > Send mobile push notifications.
- Configure when push notifications are sent depending on your availability in Account Settings > Notifications > Mobile push notifications > Trigger push notifications when.
TIP
Learn more about how Mattermost detects your availability as Online, Away or Offline.
Browser Tab Notifications
If Mattermost is open in a browser tab, the favicon updates to notify you of unread messages (*) and a count of mentions or Direct Messages. Browser tab notifications are available on Chrome, Edge, Firefox, Safari.

Muting a Channel
Channels in the sidebar are bold when there are unread messages in the channel and show a badge count if you are mentioned specifically.
When you mute a channel, you do not receive any notifications (desktop, email, or push) for any mentions (whether they are channel-wide or directed at you). However, if you are mentioned while the channel is muted, the mention badge will be displayed in the sidebar with the channel displaying at reduced opacity.
To mute a channel, click on the channel name and select Mute Channel. To unmute it, click on the channel name and select Unmute Channel.
TIP
Mentions are triggered by selected keywords. Learn more about mentioning teammates.
Ignoring Mentions
To turn off notifications for channel-wide mentions for @channel, @here, and @all, navigate to Notification Preferences > Ignore mentions for @channel, @here and @all. Choose Edit, select On, and then select Save.
When this setting is on you will still receive notifications for direct mentions.
Note: If you have muted a channel and also enabled Ignore mentions for @channel, @here and @all then you will not receive any notifications (whether they’re direct or channel-wide). However, if you are directly mentioned in the muted channel a badge counter will be displayed in the sidebar.
You can also view the notifications flow charts for more information about notification behavior in Mattermost.
Organising Your Sidebar
Keeping conversations organised in the sidebar creates an efficient workplace.
Channel types
Public channels
Public channels are open to everyone on a team. New team members are automatically added to two Public channels when they sign up: Town Square and Off-Topic.
Private channels
Private channels are for sensitive topics and are only visible to select team members. In this edition of Mattermost, any member of a Private channel can add or remove other members from Private channels.
Direct Messages and Group Messages
Use a Direct Message when you want a private conversation with one person. Use a Group Message when you want to set up a private conversation with up to seven other participants. If you want to communicate with more than seven people, you must create a Private channel. Direct and Group Messages are visible only to the people involved.
Customizing your sidebar
You can customize your sidebar based on how you use Mattermost. Customizations you make are only visible to you and won’t affect what your teammates see in their sidebars.
Here’s how your sidebar is set up by default:
- All Public and Private Channels you’ve joined are listed in the Channels category, sorted alphabetically.
- All your Direct Messages and Group Messages are listed in the Direct Messages category, sorted by recent activity.
What can you customize?
You can customize your sidebar in the following ways:
- Create custom categories.
- Group and order channels into your categories.
- Mute and unmute entire categories.
- Sort channels in each category manually, alphabetically, or by recent activity.
- Filter your sidebar to view unread channels only, or choose to group unread messages into an Unreads category.
- Manage your Direct Messages by sorting them alphabetically or by recent activity, and by setting how many to display in your sidebar.
Creating custom categories
Create custom categories to group channels together for quicker and easier navigation. For example, you can create a category called “Design” or “Marketing”.
To create categories, select the + symbol at the top of the sidebar. Or, select the More options… icon in the sidebar on any category header, then select Create New Category.
Next, type a category name, select Create, then drag any channels or Direct Messages into this new category. You can also multi-select channels and Direct Messages to drag them together as a group using CTRL/CMD+Select or SHIFT+Select. See Dragging and dropping selections below for details.
Making categories work for you
Categories are collapsible
- When collapsed, only unread channels display to reduce unnecessary scrolling.
- When expanded, all channels in the category display, including channels with unread messages.
You can reorder categories
- Drag to reorder entire categories to prioritize important conversations.
Categories can contain Direct Message conversations
- Select and drag Direct Messages into any category. You can also multi-select Direct Messages to drag them together as a group.
Renaming categories
- Select the Category options icon in the sidebar, then select Rename Category.
- Type a new category name, then select Rename.
Deleting categories
- Select the Category options icon in the sidebar, then select Delete Category.
- Select Delete to confirm or select X to cancel.
All channels and Direct Message conversations in the deleted category move back to their default Channels and Direct Messages categories. Deleting a category never removes you from channels you have joined.
Organising channels in categories
Once you’ve created categories, you can move channels within them to organise your sidebar.
Dragging and dropping selections
To select multiple channels:
- Select sequential channels and/or Direct Messages by pressing and holding SHIFT+Select.
- Select non-sequential channels and/or Direct Messages by pressing and holding CMD+Select (for Mac) or CTRL+Select (for Windows/Linux).
- Press ESC to clear channel or Direct Message selections.
Using the Mattermost Web or Desktop App, drag selected channels and/or Direct Messages between or within categories.
TIP
Multi-selected channels and Direct Messages move together as a group in the order they originally appeared.
Moving selections
In addition to selecting and dragging, you can also specify a destination for selected channels and/or Direct Messages using the Move tooption under the Channel options icon in the sidebar.
Muting and unmuting categories
When you mute or unmute a category, all channels within that category are also muted or unmuted. You can still selectively unmute specific channels within a muted category.
Select the Category options icon in the sidebar, then select Mute Category.
Once a category is muted:
- Email, desktop, and push notifications are disabled for all channels in the category.
- A mute icon displays next to each channel name in the category.
- The category and all of its channels appear at reduced opacity in the left-hand sidebar. Channels in the category aren’t marked as unread unless you’re mentioned directly.
To unmute the category, select the Category options icon in the sidebar, then select Unmute Category.
Sorting channels in categories
Select the Category options icon in the sidebar, then select Sort and choose from Alphabetically, Recent Activity, or Manually.
Group unread channels separately
By default, Mattermost provides a one-click Unreads filter to only show channels with unread activity. Alternatively, you may choose to automatically group unread channels in their own category at the top of your sidebar.
Go to Main Menu > Account Settings > Sidebar, set Group unread channels separately to On, then select Save.
- When this setting is enabled, all unread messages appear only in the Unreads category, sorted with mentions first.
- When this setting is disabled, all unread messages appear within their respective categories and channels. You can use the Unread filter to focus on only unread channels in the sidebar.
When enabled, unread channels with mentions will sort to the top of the category.

TIP
If you prefer to see only unread channels in their respective categories, we recommend collapsing your custom categories and disabling Group unread channels separately under Account Settings > Sidebar.
Managing Direct Messages
To sort your Direct Messages, select the Channel options icon in the sidebar, then select Sort and choose from Alphabetically or Recent Activity.
How many Direct Messages to display?
Control how many Direct Message conversations display in the Direct Messages category to keep your conversations manageable. You can choose to show all messages or a fixed number of messages.
To configure the number of Direct Messages to display, go to Main Menu > Account Settings > Sidebar, then set Number of direct messages to show. Or select the Channel options icon in the sidebar, then select Show.
Choose from All direct messages, or choose to show 10, 15, 20, or 40 messages. Once you exceed the number of Direct Messages configured, older messages are hidden from the Direct Messages category. You can always increase the number of conversations displayed to see older Direct Messages.
NOTE
Direct Message conversations that you add to custom categories don’t count against the maximum number of conversations shown in the Direct Messages category.
This feature is not currently supported on mobile.
Account Settings
Account Settings is accessible from the Main Menu by selecting the three horizontal lines (or hamburger menu) at the top of the channel sidebar. From here, you can configure your profile settings, notification preferences, integrations, theme settings, and display options.
General
Settings to configure name, username, nickname, email, and profile picture.
Full Name
Full names appear in the Direct Messages member list and team management modal. By default, you will receive mention notifications when someone types your first name. Entering a full name is optional.
Username
Usernames are unique identifiers appearing next to all posts. Pick something easy for teammates to recognize and recall. By default, you will receive mention notifications when someone types your username. In order to maintain message integrity, changing your username does not update @mentions in messages already posted. Username must begin with a letter, and contain between 3 to 22 lowercase characters made up of numbers, letters, and the symbols ‘.’, ‘-‘, and ‘_’.
Nickname
Nicknames appear in the Direct Messages member list and team management modal. You will not receive mention notifications when someone types your nickname unless you add it to the Words That Trigger Mentions in Account Settings > Notifications.
Position
Position can be used to describe your role or job title. It appears in the profile popup that shows up when you select a user’s name in the centre channel or right-hand sidebar.
Email is used for signing in, notifications, and password reset. Email requires verification if changed. If you are signing in using a single sign-on service, the email field is not editable and you will receive email notifications to the email you used to sign up to your SSO service.
Profile Picture
Profile pictures appear next to all posts and at the top of the channel sidebar next to your name.
To change your profile picture, select Select, then choose an image. For best results, choose an image that’s at least 128 x 128 pixels in size. Supported image formats include: BMP, JPG, JPEG, and PNG. The GIF file format is not supported.
Security
Settings to configure your password, view access history, and view or logout of active sessions.
Password
You may change your password if you’ve logged in by email. If you are signing in using a single sign-on service, the password field is not editable, and you must access your SSO service’s account settings to update your password.
Multi-factor Authentication
When this option is available, you can require a phone-based passcode in addition to your password when signing in.
To enable, download Google Authenticator from iTunes or Google Play for your phone, then:
- Select the Add MFA to your account button.
- Use Google Authenticator to scan the QR code that appears.
- Enter the token generated by Google Authenticator, then select Save.
In future, you will be asked to enter a passcode from Google Authenticator in addition to your password on login.
If you are unable to scan the QR code, you can:
- Select the Add MFA to your account button. You should see a
Secret Keybelow the QR code. - Open Google Authenticator.
- Select the + button, then select Manual Entry.
- Enter an account name.
- Enter the
Secret Keyfrom Mattermost into theKeyfield in Google Authenticator, then select Save. - In Mattermost, enter the token generated by Google Authenticator, then select Save.
Sign-in Method
This option allows you to switch your sign-in method from email/password to a single sign-on option, and back again.
For example, if AD/LDAP single sign-on is enabled, users can select a “Switch to using AD/LDAP” button and the enter their AD/LDAP credentials to switch sign-in over to AD/LDAP. They also need to enter the password for their email account to verify their existing credentials. Following the change, users receive an email to confirm the action.
View Access History
Access History displays a chronological list of the last 20 login and logout attempts, channel creations and deletions, account settings changes, or channel setting modifications made on your account. The details of the Session ID (unique identifier for each Mattermost browser session) and IP Address of the action is recorded for audit log purposes.
View and Logout of Active Sessions
Sessions are created when you log in with your email and password to a new browser on a device. Sessions let you use Mattermost for up to 30 days without having to log in again. Select Logout on an active session if you want to revoke automatic login privileges for a specific browser or device. Select More Info to view details on browser and operating system.
Notifications
Settings to configure desktop notifications, desktop notification sounds, email notifications, and words that trigger mentions.
Desktop Notifications
Desktop notifications appear in the corner of your main monitor when there is activity in Mattermost.
When Desktop App notifications are set to “Only for mentions and direct messages”, an empty red circle is displayed over the upper right corner of the Mattermost dock icon when any message without an at-mention is received. A solid red circle with a post count is displayed when a message with an at-mention is received.
Send Desktop Notifications
Choose what activity triggers a desktop notification. This setting applies globally, but this preference is customizable for each channel from the channel name drop-down menu. Desktop notifications are available on Firefox, Safari, and Chrome.
Notification Sound
Notification sounds fire for any activity that would trigger a desktop notification. Notification sounds are available on Edge, Safari and Chrome.
Email Notifications
Email notifications are sent for mentions and direct messages after you’ve been offline for more than 60 seconds or away from Mattermost for more than 5 minutes. Change the email where notifications are sent in Account Settings > General > Email.
Mobile Push Notifications
Push notifications can be sent to your mobile device if you have the Android or iOS app installed. You can choose the type of activity that will send a notification. By default, push notifications are sent “For mentions and direct messages”. If push notifications are sent “Never”, the Mattermost setting to trigger push notifications depending on your Mattermost availability is hidden. If you do not see this option, and would like it to be enabled, please contact the gE.CO toolbox support team.
If you’re actively viewing a channel (Public or Private), Direct Message, or Group Message on desktop or web, no push notifications will be sent for that channel. If a notification is viewed on desktop or web, the lockscreen notification will clear on Android, and on iOS the badge on the Mattermost app icon will decrement accordingl;
Trigger Mobile Push Notifications When
You can also choose when to send push notifications depending on your Mattermost availability. By default, push notifications are sent if your availability is Away or Offline. If Send Mobile Push Notifications is set as Never, this setting is hidden. If this setting is not showing for you, please contact the gE.CO toolbox support team.
Words That Trigger Mentions
By default, you receive notifications when someone posts a message that contains your non-case sensitive username or @username. You also receive notifications when someone uses the @channel, @all, and @here mentions. You can customize the words that trigger mentions by typing them into the input box. This is useful if you want to be notified of all posts on a certain topic, for example, “marketing”.
Reply Notifications
In addition to Words that Trigger Mentions, this setting allows you to receive mention notifications when someone replies to a thread that you started or participated in. You are considered to start a thread when you post a message to which other members of your team reply. You are considered to participate in a thread when you post a message using the reply button in an already existing thread.
Automatic Direct Message Replies
Set an automated custom message that will be sent once per day in response to Direct Messages. Mentions in Public and Private Channels won’t trigger the automated reply. Enabling Automatic Replies sets your availability to Out of Office and disables desktop, email, and push notifications. This setting is experimental; if you experience any issues with this, please contact the gE.CO toolbox support team.
Display
Settings to configure clock and teammate name display preferences.
Theme
Select Theme Colours to select from four standard themes designed by the Mattermost team. To make custom adjustments on the four standard theme colours, select a standard theme and then select Custom Theme to load the standard theme into the custom theme colour selectors.
Select Custom Theme to customize your theme colours and share them with others by copying and pasting theme vectors into the input box. Observe a live preview as you customize theme colours, then select Save to confirm your changes. Discard your changes by selecting Cancel, or by exiting the settings modal and selecting Yes, Discard.
In Enterprise Edition, if you belong to multiple teams, you can optionally select the checkbox “Apply new theme to all my teams” to have the theme show up across teams. Otherwise, the changes will only apply to the current team.
Learn more about the custom theme colour selectors here.
Select Import theme colours from Slack to import a Slack theme. In Slack, go to Preferences > Sidebar Theme and open the custom theme option. From there, copy the theme colour vector and then paste it into the Input Slack Theme input box in Mattermost. Any theme settings that are not customizable in Slack will default to the “Mattermost” standard theme settings.
Clock Display
Choose a 12-hour or 24-hour time preference that appears on the time stamp for all posts.
Teammate Name Display
Configure how names are displayed in the user interface: nickname, username or full name.
Show online availability on profile images
Online availability icons display on user profile avatars in the centre channel by default. Disable this setting to hide online availability icons within the centre channel.
Timezone
Select the timezone used for timestamps in the user interface and email notifications.
Website Link Previews
When available, the first web link in a message will show a preview of the website content below the message.
Default Appearance of Image Previews
When messages in Mattermost include images, an image preview can display directly below the message for image attachments, image link previews, and in-line images over 100px in height. You can set this preference to Expanded or Collapsed.
TIP
This setting can also be controlled using the slash commands
/expandand/collapse.
Message Display
Select the formatting for messages in the centre channel. “Compact” mode decreases the spacing around posts, collapses link previews, and hides thumbnails so only file names are shown. Some formatting types, such as block quotes and headings, are also reduced in size.
Channel Display
Select if the text in the centre channel is fixed width and centred, or full width.
Language
Select what language Mattermost displays in the user interface. Options include:
- Deutsch - German
- English (U.S.)
- English Australian
- Español - Spanish
- Français - French
- Italiano - Italian
- Magyar - Hungarian
- Nederlands - Dutch
- Polski - Polish
- Português (Brasil) - Portuguese
- Română - Romanian
- Svenska - Swedish
- Türkçe - Turkish
- български - Bulgarian
- Pусский - Russian
- Yкраїнська - Ukrainian
- 한국어 - Korean
- 中文 (简体) - Simplified Chinese
- 中文 (繁體) - Traditional Chinese
- 日本語 - Japanese
Sidebar
The channel sidebar includes enhanced sidebar features, including custom, collapsible channel categories, drag and drop, unread filtering, channel sorting options, and more.
The following sidebar settings apply to your current sidebar only:
Group unread channels separately
This feature groups unread channels at the top of the channel sidebar in an Unreads category. You can choose to enable it or disable it in Account Settings > Sidebar.
Advanced
Settings to configure when messages are sent.
Send messages on CTRL+ENTER
If “On for all messages” is enabled, ENTER inserts a new line and CTRL+ENTER posts a message. If “On only for code blacks starting with ```” is enabled, ENTER inserts a new line inside an open code block and CTRL+ENTER automatically closes the code block and posts the message. If disabled, SHIFT+ENTER inserts a new line and ENTER posts the message.
Enable Post Formatting
This setting controls whether post formatting is rendered. When “On”, posts will be rendered with markdown formatting, emoji, autolinked URLs, and line breaks. When “Off”, the raw text will be shown.
Enable Join/Leave Messages
This setting controls whether system messages about users joining or leaving a channel are visible. When On these messages will appear. When Off, these messages will be hidden. If any users are added to or removed from a channel, a system message will still be shown even if this setting is Off.
Preview pre-release features
Turn on preview features to view them early, ahead of their official release:
- Show markdown preview option in message input box Turning this on will show a “Preview” option when typing in the text input box. Pressing “Preview” shows what the Markdown formatting in the message looks like before the message is sent.
Deactivate Account
Use this setting to deactivate your account. After deactivating, an email notification is sent confirming the deactivation was successful.
Deactivating your account removes your ability to log in to Mattermost and disables all email and mobile notifications. To reactivate your account, please contact the gE.CO toolbox support team.
Theme Colours
The colours of the Mattermost user interface are customizable in Account Settings > Display > Theme. You can import your theme colours from Slack, customize the colours yourself, or choose from four standard themes designed by the Mattermost team.
Import Theme from Slack
To import a theme, in Slack, go to Preferences > Themes, select Create a custom theme, then copy the theme colour values.
In Mattermost, select Import theme colours from Slack, then paste the colour values into the input box and select Submit. Any theme settings that are not customisable in Slack will default to the “Mattermost” standard theme settings. Select Save to confirm your theme changes.
Custom Themes
Select Custom Theme, then expand the Sidebar Styles, Centre Channel Styles, and Link and Button Styles options to customise individual interface colours, such as backgrounds, links, text, and borders.
Your custom theme changes are applied in Mattermost as you make them. Select Save to confirm your theme changes. Discard your changes by exiting the Display Settings window and selecting Yes, Discard.
Standard Themes
Select Theme Colours to choose from four standard themes designed by the Mattermost team. To make custom adjustments on the four standard theme colours, select a standard theme, then select Custom Theme to further customise that standard theme based on your preferences. Select Save to confirm your theme changes.
Sidebar Styles
-
Sidebar BG
Background colour of the Channels pane, and Account and Team settings navigation sidebars.
-
Sidebar Text
Text colour of read channels in the Channels pane, and tabs in the Account and Team settings navigation sidebar.
-
Sidebar Header BG
Background colour of the header above the Channels pane and all dialog window headers.
-
Sidebar Header Text
Text colour of the header above the Channels pane and all dialog window headers.
-
Sidebar Unread Text
Text colour of unread channels in the Channels pane.
-
Sidebar Text Hover BG
Background colour behind channel names and settings tabs as you hover over them.
-
Sidebar Text Active Border
Colour of the rectangular marker on the left side of the Channels pane or Settings sidebar indicating the active channel or tab.
-
Sidebar Text Active Colour
Text colour of the active channel or tab in the Channels pane or Settings sidebar.
-
Online Indicator
Colour of the online indicator appearing next to team members names in the Direct Messages list.
-
Away Indicator
Colour of the away indicator appearing next to team members names in the Direct Messages list when they have had no browser activity for 5 minutes.
-
Do Not Disturb Indicator
Colour of the do not disturb indicator appearing next to team members names in the Direct Messages list.
-
Mention Jewel BG
Background colour of the jewel indicating unread mentions that appears to the right of the channel name. This is also the background colour of the “Unread Posts Below/Above” indicator appearing at the top or bottom of the Channels pane on shorter browser windows.
-
Mention Jewel Text
Text colour on the mention jewel indicating the number of unread mentions. This is also the text colour on the “Unread Posts Below/Above” indicator.
Centre Channel Styles
-
Centre Channel BG
Colour of the centre pane, right-hand sidebar and all dialog window backgrounds.
-
Centre Channel Text
Colour of all the text - with the exception of mentions, links, hashtags and code blocks - in the centre pane, right-hand sidebar, and dialogs.
-
New Message Separator
The new message separator appears below the last read message when you switch to a channel with unread messages.
-
Error Text Coloir
Colour of all error text.
-
Mention Highlight BG
Highlight colour behind your words that trigger mentions in the centre pane and right-hand sidebar.
-
Mention Highlight Link
Text colour of your words that trigger mentions in the centre pane and right-hand sidebar.
-
Code Theme
Background and syntax colours for all code blocks.
Link and Button Styles
-
Link Colour
Text colour of all links, hashtags, teammate mentions, and low priority UI buttons.
-
Button BG
Colour of the rectangular background behind all high priority UI buttons.
-
Button Text
Text colour appearing on the rectangular background for all high priority UI buttons.
Exporting a Custom Theme
You can export a theme from Mattermost by copying the theme values from the Custom Theme menu.
Go to Account Settings > Display > Custom Theme, then select Copy Theme Colours to export the theme’s colour values.
Importing a Custom Theme
You can import a theme into Mattermost by pasting the theme values into the Custom Theme menu.
Copy existing theme values, then go to Account Settings > Display > Custom Theme to paste the theme values into the Copy and paste to share theme colours field. Select Save to confirm your theme changes.
Custom Theme Examples
Customize your theme colours and share them with others by copying and pasting theme values into the input box. Below are some example themes with their corresponding theme values.
GitHub Theme

{"awayIndicator":"#D4B579","buttonBg":"#66CCCC","buttonColor":"#FFFFFF","centerChannelBg":"#FFFFFF","centerChannelColor":"#444444","codeTheme":"github","linkColor":"#3DADAD","mentionBg":"#66CCCC","mentionColor":"#FFFFFF","mentionHighlightBg":"#3DADAD","mentionHighlightLink":"#FFFFFF","newMessageSeparator":"#F2777A","onlineIndicator":"#52ADAD","sidebarBg":"#F2F0EC","sidebarHeaderBg":"#E8E6DF","sidebarHeaderTextColor":"#424242","sidebarText":"#2E2E2E","sidebarTextActiveBorder":"#66CCCC","sidebarTextActiveColor":"#594545","sidebarTextHoverBg":"#E0E0E0","sidebarUnreadText":"#515151"}
Monokai Theme

{"awayIndicator":"#B8B884","buttonBg":"#90AD58","buttonColor":"#FFFFFF","centerChannelBg":"#FFFFFF","centerChannelColor":"#444444","codeTheme":"monokai","linkColor":"#90AD58","mentionBg":"#7E9949","mentionColor":"#FFFFFF","mentionHighlightBg":"#54850C","mentionHighlightLink":"#FFFFFF","newMessageSeparator":"#90AD58","onlineIndicator":"#99CB3F","sidebarBg":"#262626","sidebarHeaderBg":"#363636","sidebarHeaderTextColor":"#FFFFFF","sidebarText":"#FFFFFF","sidebarTextActiveBorder":"#7E9949","sidebarTextActiveColor":"#FFFFFF","sidebarTextHoverBg":"#525252","sidebarUnreadText":"#CCCCCC"}
Solarized Dark Theme

{"awayIndicator":"#E0B333","buttonBg":"#859900","buttonColor":"#fdf6e3","centerChannelBg":"#073642","centerChannelColor":"#93a1a1","codeTheme":"solarized-dark","linkColor":"#268bd2","mentionBg":"#dc322f","mentionColor":"#ffffff","mentionHighlightBg":"#d33682","mentionHighlightLink":"#268bd2","newMessageSeparator":"#cb4b16","onlineIndicator":"#2AA198","sidebarBg":"#073642","sidebarHeaderBg":"#002B36","sidebarHeaderTextColor":"#FDF6E3","sidebarText":"#FDF6E3","sidebarTextActiveBorder":"#d33682","sidebarTextActiveColor":"#FDF6E3","sidebarTextHoverBg":"#CB4B16","sidebarUnreadText":"#FDF6E3","errorTextColor":"#dc322f"}
Gruvbox Dark Theme

{"awayIndicator":"#fabd2f","buttonBg":"#689d6a","buttonColor":"#ebdbb2","centerChannelBg":"#3c3836","centerChannelColor":"#ebdbb2","codeTheme":"monokai","errorTextColor":"#fb4934","linkColor":"#83a598","mentionBg":"#b16286","mentionColor":"#fbf1c7","mentionHighlightBg":"#d65d0e","mentionHighlightLink":"#fbf1c7","newMessageSeparator":"#d65d0e","onlineIndicator":"#b8bb26","sidebarBg":"#282828","sidebarHeaderBg":"#1d2021","sidebarHeaderTextColor":"#ebdbb2","sidebarText":"#ebdbb2","sidebarTextActiveBorder":"#d65d0e","sidebarTextActiveColor":"#fbf1c7","sidebarTextHoverBg":"#d65d0e","sidebarUnreadText":"#fe8019"}
One Dark Theme

{"sidebarBg":"#21252b","sidebarText":"#abb2bf","sidebarUnreadText":"#abb2bf","sidebarTextHoverBg":"#3a3f4b","sidebarTextActiveBorder":"#4d78cc","sidebarTextActiveColor":"#d7dae0","sidebarHeaderBg":"#282c34","sidebarHeaderTextColor":"#abb2bf","onlineIndicator":"#98c379","awayIndicator":"#d19a66","dndIndicator":"#be5046","mentionBg":"#98c379","mentionColor":"#ffffff","centerChannelBg":"#282c34","centerChannelColor":"#abb2bf","newMessageSeparator":"#c67add","linkColor":"#61afef","buttonBg":"#4d78cc","buttonColor":"#ffffff","errorTextColor":"#f44747","mentionHighlightBg":"#525a69","mentionHighlightLink":"#61afef","codeTheme":"monokai","mentionBg":"#98c379"}
Discord Dark Theme

{"sidebarBg":"#2f3136","sidebarText":"#ffffff","sidebarUnreadText":"#ffffff","sidebarTextHoverBg":"#33363c","sidebarTextActiveBorder":"#66cfa0","sidebarTextActiveColor":"#ffffff","sidebarHeaderBg":"#27292c","sidebarHeaderTextColor":"#ffffff","onlineIndicator":"#43b581","awayIndicator":"#faa61a","dndIndicator":"#f04747","mentionBg":"#6e84d2","mentionBg":"#6e84d2","mentionColor":"#ffffff","centerChannelBg":"#36393f","centerChannelColor":"#dddddd","newMessageSeparator":"#6e84d2","linkColor":"#2095e8","buttonBg":"#43b581","buttonColor":"#ffffff","errorTextColor":"#ff6461","mentionHighlightBg":"#3d414f","mentionHighlightLink":"#6e84d2","codeTheme":"monokai"}
Night Owl Dark Theme

{"sidebarBg":"#011627","sidebarText":"#d6deeb","sidebarUnreadText":"#d6deeb","sidebarTextHoverBg":"#1d3b53","sidebarTextActiveBorder":"#ff2c83","sidebarTextActiveColor":"#82aaff","sidebarHeaderBg":"#1d3b53","sidebarHeaderTextColor":"#d6deeb","onlineIndicator":"#addb67","awayIndicator":"#ffbc42","dndIndicator":"#f74343","mentionBg":"#d6deeb","mentionBg":"#d6deeb","mentionColor":"#145dbf","centerChannelBg":"#011627","centerChannelColor":"#d6deeb","newMessageSeparator":"#ff8800","linkColor":"#2389d7","buttonBg":"#166de0","buttonColor":"#011627","errorTextColor":"#fd5960","mentionHighlightBg":"#0b2942","mentionHighlightLink":"#82aaff","codeTheme":"solarized-dark"}
Desktop App Options
In addition to Mattermost Account Settings, the Desktop App provides additional options to customize your experience.
The options appear in the Settings page, available on Windows from … > File > Settings, or on Mac from Mattermost > Preferences.
-
Start app on login (Windows, Linux only)
When enabled, the Mattermost application starts when you log in to your machine. This setting is enabled by default.
-
Check spelling
When enabled, based on your system language configuration misspelled words in your messages are highlighted. This setting is enabled by default. You must restart the app to change this setting.
-
Show red badge on taskbar icon to indicate unread messages (Windows, macOS only)
When enabled, a red badge is shown on the taskbar icon for unread messages with a number count indicating unread mentions or Direct Messages. If disabled, a red badge is only shown for unread mentions (with a number count). This setting is enabled by default.
-
Flash taskbar icon when a new message is received (Windows, Linux only)
Configure whether the taskbar icon flashes for a few messages when a new message is received on any of your active teams and servers. This setting is enabled by default.
-
Bounce the Dock icon when receiving a notification (macOS only)
When enabled, the Dock icon will either bounce once or bounce until the user opens the app when receiving a notification. This setting is enabled by default.
-
Show Mattermost icon in the menu bar (Mac only)
When enabled, Mattermost icon is added to the Mac menu bar. This setting is disabled by default.
-
Show icon in the notification area (Linux only)
When enabled, the Mattermost icon is added to the Linux notification area. This setting is enabled by default.
-
Leave app running in notification centre when application window is closed (Linux only)
When enabled, closing the application window leaves the Mattermost Desktop App running in your notification centre. This can be useful if you want to check for unread mentions while away from the app. This setting is enabled by default.
-
Use GPU hardware acceleration
When enabled, the Mattermost user interface is rendered more efficiently but can lead to decreased stability for some systems. This setting is enabled by default. You must restart the app to change this setting.
Dark Theme
On macOS, the Mattermost desktop app respects the System Preferences appearance setting of the operating system to set the theme of the title bar. On Windows, you can toggle the theme of the Mattermost desktop app title bar in … > View > Toggle Dark Mode.

Navigate Mattermost Messaging
Keyboard Accessibility
Navigational keyboard shortcuts help you use Mattermost without requiring a mouse. Below is a list of supported shortcuts. Elements in focus have a colored outline, as shown here:

| Shortcut | Description |
|---|---|
| F6 (CTRL+F6 on Browser) | Move focus to the next section |
| SHIFT+F6 (SHIFT+CTRL+F6 on Browser) | Move focus to the previous section |
| TAB | Move focus to the next element |
| SHIFT+TAB | Move focus to the previous element |
| Up or DOWN | Move focus between messages in the post list or sections in the channel sidebar |
| ENTER | Take action on the focused element |
Region Navigation
Region Navigation
Mattermost has eight regions that can be focused for navigation. Use F6 (Desktop App) or CTRL+F6 (Browser) repeatedly to move focus and loop through the regions in this order:
- Message list region
- Message input region
- Right-hand side message list region
- Right-hand side message input region
- Team menu region
- Channel sidebar region
- Channel header region
- Search
Message Navigation
When the message list region is focused, use the UP or DOWN arrow keys to navigate through messages. Press TAB to navigate through message actions.
Message Composition
Mattermost is compatible with most popular screen readers, such as Apple VoiceOver or JAWS for Windows. A custom readout is composed for each message by combining the message elements and reading them together in full sentences. Message elements will read in the following order:
- Header: Author, timestamp, message type (i.e. parent post or reply)
- Main Content: The message content typed by the author
- Attachments: The number of attachments (if applicable)
- Emoji Reactions: The number of unique emoji reactions (if applicable)
- Saves/Pins: If a message is saved or pinned (if applicable)
For example, a message read by a screen reader may sound like the following:
Eric Sethna at 12:57pm Thursday June 13th wrote a reply "Thanks for the review", 3 attachments, 2 reactions, message is saved and pinned.
Channel Sidebar Navigation
When the channel sidebar region is focused, use the UP or DOWN arrow keys to focus individual sidebar sections, such as Favorites, Public Channels, Private Channels and Direct Messages. Press TAB to navigate through channels or other buttons within a sidebar section.
Keyboard Shortcuts
Keyboard shortcuts perform operations in Mattermost to help you navigate through channels and make a more efficient use of your keyboard. See also slash commands for alternate ways to help carry out actions with a keyboard instead of a mouse.
To display a list of available keyboard shortcuts, type CTRL+/ (CMD+/ on Mac), or /shortcuts.
NOTE
Though Mattermost keyboard shortcuts support standard languages and keyboard layouts, they may not work if you use keymapping that overwrites default browser shortcuts.
Navigation
| On Windows | On Mac | Description |
|---|---|---|
| ALT+UP | OPTION+UP | Previous channel or direct message in the channel sidebar |
| ALT+DOWN | OPTION+DOWN | Next channel or direct message in the channel sidebar |
| ALT+SHIFT+UP | OPTION+SHIFT+UP | Previous channel or direct message in the channel sidebar with unread messages |
| ALT+SHIFT+DOWN | OPTION+SHIFT+DOWN | Next channel or direct message in the channel sidebar with unread messages |
| CTRL+ALT+UP | CMD+OPTION+UP | Previous team |
| CTRL+ALT+DOWN | CMD+OPTION+DOWN | Next team |
| CTRL+ALT+[1-9] | CMD+OPTION+[1-9] | Switch to a specific team |
| CTRL+K | CMD+K | Open a quick channel switcher dialog |
| CTRL+SHIFT+K | CMD+SHIFT+K | Open the Direct Messages dialog |
| CTRL+SHIFT+A | CMD+SHIFT+A | Open the Account Settings dialog |
| CTRL+SHIFT+M | CMD+SHIFT+M | Open recent mentions |
| CTRL+SHIFT+L | CMD+SHIFT+L | Set focus to centre channel input field |
| CTRL+. | CMD+. | Open and close the right-hand sidebar |
| CTRL+SHIFT+F (Mobile App) CTRL+F (Desktop App) | CMD+SHIFT+F (Mobile App) CMD+F (Desktop App) | Move focus to the Search field and search the current channel |
Files
| On Windows | On Mac | Description |
|---|---|---|
| CTRL+U | CMD+U | Upload a file |
Messages
| On Windows | On Mac | Description |
|---|---|---|
| CTRL+UP (in empty input field) | CMD+UP (in empty input field) | Reprint previous message or slash command you entered |
| CTRL+DOWN (in empty input field) | CMD+DOWN (in empty input field) | Reprint next message or slash command you entered |
| SHIFT+UP (in empty input field) | SHIFT+UP (in empty input field) | Reply to the most recent message in the current channel |
| UP (in empty input field) | UP (in empty input field) | Edit your last message in the current channel |
| @[character]+TAB | @[character]+TAB | Autocomplete @username beginning with [character] |
| ~[character]+TAB | ~[character]+TAB | Autocomplete channel beginning with [character] |
| :[character]+TAB | :[character]+TAB | Autocomplete emoji beginning with [character] |
| CTRL+SHIFT+\ | CMD+SHIFT+\ | React to last message in channel or thread |
Formatting
| On Windows | On Mac | Description |
|---|---|---|
| CTRL+B | CMD+B | Bold text |
| CTRL+I | CMD+I | Italicize text |
| CTRL+ALT+K | CMD+ALT+K | Format text as a link |
Browser Built-in
| On Windows | On Mac | Description |
|---|---|---|
| ALT+LEFT | CMD+[ | Previous channel in your history |
| ALT+RIGHT | CMD+] | Next channel in your history |
| CTRL+PLUS | CMD+PLUS | Increase font size (zoom in) |
| CTRL+MINUS | CMD+MINUS | Decrease font size (zoom out) |
| SHIFT+UP (in input field) | SHIFT+UP (in input field) | Highlight text to the previous line |
| SHIFT+DOWN (in input field) | SHIFT+DOWN (in input field) | Highlight text to the next line |
| SHIFT+ENTER (in input field) | SHIFT+ENTER (in input field) | Create a new line |